Para rowing is a sport full of small, expensive workarounds. Adaptive handles, special clamps, and one-off grips from prosthetics clinics can cost hundreds of dollars and weeks of waiting. 3D printed custom oar grips for para rowers offer a faster, far cheaper route: a coach, therapist, or athlete can go from a smartphone scan to a finished oar grip in less than one day, using under five dollars worth of filament. The workflow is approachable, the design is deeply personalized, and it scales from a single home rower to an entire adaptive club.
Why Standard Oar Grips Fail Para Rowers
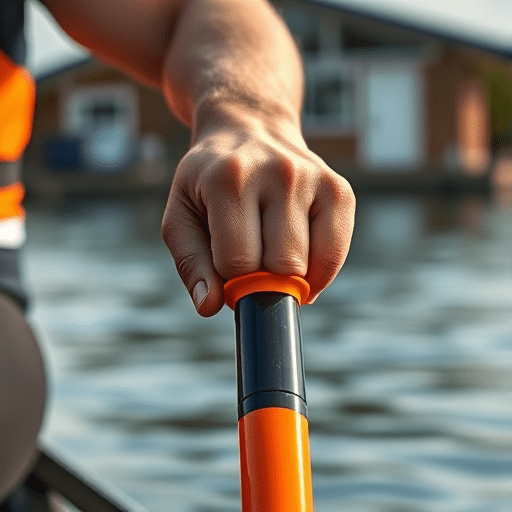
Most rowing oar handles are a simple synthetic tube, roughly 28 mm to 30 mm in diameter, wrapped in a thin foam or rubber sleeve. That geometry presumes a hand with full wrist control, independent finger flexion, and enough opposable thumb strength to hold the shaft firmly through the drive phase. For a para rower with reduced grip strength, a spinal cord injury, or limited hand dexterity, the oar will rotate, slip, or demand an over-grip that causes cramps and fatigue before the boat even settles.
A one-size-fits-all handle also ignores the huge variation in functional hand postures between athletes. A rower with Good Samaritan syndrome after a C6 injury may have wrist extension but no finger flexion. Another athlete with muscular dystrophy may have usable pinch but no stamina for sustained gripping. In both cases, the fix is not stronger hands — it is a different handle geometry.
A Low-Cost Adaptive Equipment Workflow That Works
The newer generation of affordable desktop 3D printers, combined with mature flexible filaments like TPU, has turned adaptive equipment design into something a boathouse can do in-house. The workflow has three major parts: capture the shape, model the interface, and print with the right material and settings.
Step 1: Capture the Hand and the Oar
Before you print, you need to know two dimensions: the oar shaft diameter at the grip location and the shape of the rower’s hand in its most functional, relaxed position. Measuring the shaft is simple — a caliper reading at three points around the grip area gives you an average diameter. The hand is trickier.
You do not need a professional 3D scanner. A modern smartphone with a free photogrammetry app like Polycam or KIRI Engine can turn a sixty-second video walk-around into a workable digital mesh. For hands that tremble or cannot stay in one posture, film the hand resting on a flat surface while the athlete holds a tube of the same diameter as the oar. If a scan fails, a paper trace with measured palm width, finger length, and the natural hand angle is enough to start a rough geometry. The important part is to capture what the hand wants to do, not what it does when forced around a round handle.
Step 2: Model a Sleeve, Then Add a Hand Interface
Start in a free CAD program — Tinkercad works for basic sleeves, while Fusion 360 is better for organic contours. The base model is a simple tube with an inner diameter about 0.3 mm smaller than the shaft measurement. The TPU will flex enough to snap over the oar and grip it firmly without glue. A slip-on fit also makes the grip removable for washing or swapping between boats.
Once the sleeve is modeled, the interesting work begins. Add a shaped palm shelf for athletes who cannot wrap their fingers, a thumb stop for those who cannot oppose the thumb, or a dorsal hood that wraps loosely over the back of the hand, so the oar is held by the web of the thumb and the palm rather than by finger strength. Start with one feature per iteration, print it, try it, and let the feedback drive the next version.
Step 3: Build in Tactile Orientation Cues
Because the grip is printed, you can easily add a raised ridge or a small depression along the top of the handle. This gives the athlete orientation feedback through touch alone — a huge benefit for rowers with impaired sensation or limited vision. Feeling the ridge tells the rower whether the oar is flat or feathered, without looking down or adding any weight to the shaft.
Choosing the Right Filament for a Wet, Sunlit Sport
Not all 3D-printed materials belong near water. PLA is brittle, slippery when wet, and degrades under UV light — it is a poor choice for a grip that lives on the edge of a wet blade. The clear winner for custom oar grips is TPU (thermoplastic polyurethane). TPU is flexible, tough, UV-resistant, and naturally high-friction, even when dipped in water.
Pay attention to Shore hardness. A Shore 85A TPU offers good cushioning but may flex too much during the drive phase, turning a secure hold into a spongy one. Shore 95A is stiffer and closer to the feel of a standard foam-handle oar, and it prints more easily on Bowden-style printers. If you are using a resin printer, flexible resins in the 60A – 70A range create comfortable grips but are more sensitive to cold temperatures and cost more per part. Most DIY builds settle on a single roll of 95A TPU, which is about thirty to forty dollars and can print several complete grip sets.
Print Settings That Make a Difference
TPU printing has a reputation for being finicky, but the failure points are well understood. The following settings and habits will keep your print clean and repeatable:
- Dry your filament first. TPU absorbs moisture aggressively even in normal indoor air. A damp roll produces steam bubbles and weak layer adhesion. A filament dryer, or four hours in a food dehydrator at 50°C, is worth the wait.
- Slow down. A print speed of 20 – 30 mm/s is slow but necessary for quality flexible parts. Faster speeds push the soft filament into the wrong shapes.
- Use more perimeters, not more infill. Five or six wall perimeters give the grip strength and water resistance, while a 15 – 20% gyroid infill keeps it light. Solid TPU grips work, but they can feel dead and heavy in the boat.
- Print with a brim. A 5 mm brim holds the curved base of the grip down and prevents warping, especially when printing narrow sleeves.
- Keep the cooling fan low. TPU needs less cooling than PLA. A fan setting around 30 – 40% prevents stringing without causing weak layer bonds.
Fit Testing: The Five-Dollar Iteration Loop
There is no way to get the grip perfect on the first try — but that does not matter, because each attempt costs roughly a dollar in filament. The real advantage of the low-cost adaptive equipment path is the speed of iteration. On the first on-water session, keep it simple: five minutes of low-pressure paddling, then ten minutes of steady-state rowing, then a short 500-meter piece to stress test the grip.
Watch for specific signs of mismatch. If the hand slides sideways, add a raised contoured ridge on the side of the grip. If the wrist is constantly cocked backward, build up the palm shelf so the oar sits deeper in the hand. If the athlete’s fingers spasm and pull off the handle, extend the flange or add a soft interior channel that protects the fingertips.
Because each modification is small and the digital file is versioned, you can even print a second variant overnight and give the athlete two options to compare the next morning. That is an experience no custom orthopedic clinic can match, and it is exactly why this approach has become the default in many adaptive boathouses.
Durability and Maintenance for the Long Season
A well-printed TPU oar grip will easily survive a full season of training. To extend its life, rinse it with fresh water after saltwater sessions, and check periodically for wear at the attachment point against the oar collar. TPU is resistant to most boatyard chemicals but should be kept away from petroleum-based degreasers. If a grip begins to loosen, the simplest fix is printing a thin TPU shim sleeve that fits between the original grip and the shaft — one more small advantage of holding the CAD file on your own laptop rather than relying on a supplier.
3D printed custom oar grips for para rowers are more than a piece of sports equipment; they are a natural fit for how adaptive sport should work: quick, local, and shaped around a real human hand. With a phone scan, a free CAD tool, and a roll of TPU, the barrier to entry is no longer cost, wait times, or an engineering degree — it is only the willingness to iterate.