If someone grabs you on the street, a slow wrist escape can turn a survivable moment into a losing one. Wrist escape speed for real-world self-defense is less about flashy technique and more about how fast your hands can break contact before a grab turns into a drag, a takedown, or worse. The good news is that speed here is highly trainable, even if you have never rolled a single mat session. This guide walks through a beginner-friendly drill plan built around resistance bands, simple partner feeds, and short timed pressure tests that translate directly to chaotic, unpredictable encounters.
Why Wrist Escape Speed Matters More Than Grip Strength
Most people instinctively try to out-muscle a grab. On the street, that usually fails. Attackers choose targets partly because they expect you to freeze and pull straight back. The fastest escapes use a combination of rotation, redirection, and retraction, executed within the first half-second of contact. Training your nervous system to recognize a grab and fire an escape before your brain fully processes the event is the real goal.
This is why we focus on speed, not strength. A quick rotational break, a frame, or a step-and-twist can defeat a grip many times stronger than yours, provided it arrives early. The drills below are designed to compress that reaction window.
The Three Components of a Fast Wrist Escape
Before drilling, internalize the three mechanical pieces every escape shares, whether you are dealing with a single-hand grab, a two-on-one trap, or a sleeve pull.
- Recognize and re-angle your thumb. The thumb is the weakest link of any grip. Rotating your hand so the thumb points upward, sideways, or toward the attacker’s forearm is the universal first move.
- Create slack or a frame. A small step, a shoulder shrug, or a brief pull toward the attacker can disrupt their balance long enough to slip free.
- Retract to a safe distance or counter-position. Once free, your hand should land somewhere useful, such as a frame on the bicep, a parry position, or chambered for a strike.
Speed is built by chaining these three together with minimal hesitation. Each drill below stresses one or more of these phases.
Phase 1: Resistance Band Solo Drills
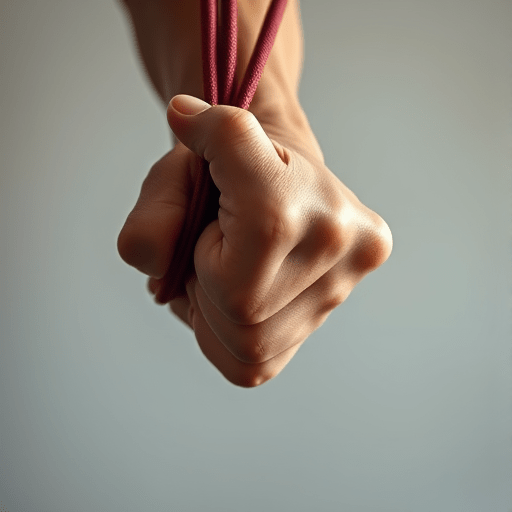
Resistance bands are the single most underrated tool for wrist escape training. They let you rehearse the rotation against constant tension, training the fast-twitch fibers that actually fire when you need to break a hold.
Drill 1: Thumb-Up Rotation Snaps
Anchor a band at about waist height to a post, door anchor, or heavy bag. Loop it over your wrist with your palm facing down, thumb pointing at the anchor. From this loaded position, explosively rotate your thumb up while pulling your hand back to your hip. Reset and repeat for three sets of 8 to 12 reps per side.
The key is to start each rep slow, then snap the rotation. Over time, the snap becomes your default motor pattern.
Drill 2: Circular Slip-Outs
Loop the band around your wrist as before, but this time imagine your fingers are pointing toward the anchor. Practice a tight circular motion, thumb leading, that spirals your hand free from the band. Think of corkscrewing out rather than yanking. Two sets of 10 per arm is plenty.
This drill directly mimics the motion used to escape a cross-grab on the wrist or sleeve.
Drill 3: Double-Wrist Compound
Use two bands, one on each wrist, anchored slightly apart. Practice escaping both simultaneously, prioritizing the strong side while the weak side follows. Real attackers rarely give you a clean single grab, so training both wrists under load builds the coordination you need.
Phase 2: Partner Feed Drills
Solo band work builds the engine. Partner feeds teach you to deploy it under imperfect conditions. Find a training partner, a family member, or even a willing friend, and start slow. Communication matters more than intensity.
Feed 1: Random Grip, Single Hand
Your partner randomly grabs your wrist in one of three grips: same-side grab, cross-grab, or thumb-up grab. On a whistle or visual cue, you escape as fast as possible. Partner then resets and grabs again.
Start at walking pace for two minutes, then gradually speed up. Your goal is sub-half-second escapes, but for beginners, anything under one second is a win.
Feed 2: Two-Hand Trap and Shuffle
Partner uses both hands to trap one of your wrists, simulating a control position common in real assaults. Your job is to break the weak thumb first, then follow with a frame and step-out. Reset, swap sides every 30 seconds.
Feed 3: Moving Grab
While you walk or shuffle in a small box, partner attempts a grab at random moments. You escape, reset your stance, and continue moving. This drill adds the spatial chaos you will actually face on the street and forces your escapes to work from imperfect angles.
Phase 3: Timed Pressure Tests
This is where training meets stress. Pressure tests simulate the adrenaline dump and decision speed you need under real threat.
Test 1: Five-Grab Sprint
Set a timer for 20 seconds. Your partner attempts five grabs in succession, alternating grips and sides. Count how many you escape cleanly within the window. Track your score over weeks. Most beginners start around two out of five. Six months in, hitting four or five consistently is realistic.
Test 2: Verbal Cue Chaos
Combine verbal distraction with grabs. While your partner calls out colors, numbers, or simple questions, they also grab you at random. Escape, answer briefly, escape again. The dual task forces your brain to operate under split attention, a more realistic stress model than pure silence.
Test 3: Grab-and-Drag Simulation
Partner grabs your wrist and applies slow, steady pulling force as if trying to move you off-balance or toward a vehicle. Your escape must include a step or a frame, not just a wrist break. Time how long you can resist before being pulled off your mark. Lower numbers mean faster, more committed escapes.
Programming the Plan Into Your Week
You do not need hours. Three sessions a week, 20 to 30 minutes each, will produce noticeable gains in four to six weeks. A balanced week looks like this:
- Day 1: Resistance band solo drills, 15 minutes
- Day 2: Partner feed drills, 20 minutes
- Day 3: Timed pressure tests, 15 minutes, plus one round of band work
Rest days are for recovery, but also for visualization. Spend five minutes mentally rehearsing clean escapes. Visualization strengthens the same neural pathways as physical reps and accelerates skill consolidation.
Common Mistakes That Kill Escape Speed
Even motivated beginners fall into the same traps. Avoid these and you will progress faster.
- Pulling straight back. Always re-angle first, then retract. Linear pulls against a strong grip lose every time.
- Looking at the grab. Eyes should scan the threat, the environment, and the exit, not your own wrist.
- Skipping the reset. Every escape should end in a stance that lets you move, strike, or escape again. Floating hands are wasted speed.
- Training only the strong side. Real attackers target your weaker arm. Train both, even if progress feels uneven.
Conclusion
Building wrist escape speed for real-world self-defense is a practical, measurable project that fits into a small corner of your week. Resistance bands build the mechanical engine, partner feeds teach you to deploy it under chaos, and timed pressure tests prove you can do it when your heart rate is up. After a few weeks of consistent practice, you will notice a quiet confidence in how your hands move when something touches your wrist. That confidence, more than any single technique, is what keeps you safe on the street.