You opened a health app, tapped through a quick onboarding screen, and hit “Yes, I agree” out of habit. Within seconds, the app may have legally acquired permission to collect your sleep patterns, heart rate variability, menstrual cycle data, or even GPS-tagged workout routes — and in 2026, that data can be packaged, anonymized, and sold to data brokers before you have your next coffee. The good news: accidentally agreeing is not the same as permanently losing control. You can withdraw consent after accidentally agreeing in a health app, but speed matters. Here is exactly how to revoke permission before your data gets sold.
Why a Single Tap Can Authorize So Much
Most medical and fitness apps use layered consent screens. The first tap often triggers a cascade of secondary authorizations hidden across multiple pages. These may include sharing information with “analytics partners,” “advertising partners,” or “research affiliates.” In many cases, the legal language allows the app to share data with a third-party SDK that re-identifies and sells it to a data marketplace. Because regulators in several regions now focus on actual user intent, your accidental agreement is still valid — but your withdrawal is equally valid, and it can be applied retroactively under many privacy frameworks.
The critical step is to act before the data leaves the app’s environment. That window can be minutes or hours, so do not postpone revocation.
Step 1: Open the App’s Privacy Dashboard Before Touching Anything Else
Your first move is not to delete the app. Deleting the app without revoking consent can leave collected data floating in a vendor’s database for years. Instead, open the app settings and locate the privacy or consent dashboard. Look for labels such as:
- “Privacy Center”
- “Data Sharing Controls”
- “Consent Management”
- “Permissions and Third-Party Partners”
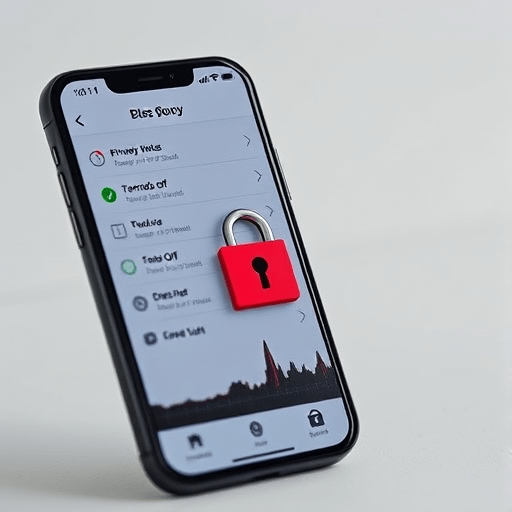
Within that dashboard, review every toggle that is switched on. Apps that genuinely respect user rights will allow you to switch off each category independently. If you see a single “revoke all” button, tap it immediately. Then manually check categories like “analytics,” “ads,” “health research,” and “cross-device tracking.” Even if the app’s marketing copy says “we never sell your health data,” the data-sharing permissions may still allow a broker to download an aggregate dataset that includes your metrics.
Step 2: Withdraw Permissions at the Operating-System Level
After clearing the in-app consent toggles, close the app and go to your phone’s system settings. On an iPhone, open Settings, scroll to the specific health app, and disable permissions for Health Kit, motion activity, Bluetooth, location, and microphone. On Android, go to Settings → Apps → the app → Permissions, then deny every permission that is not absolutely required for the app to function. Revoking these permissions can stop a data pipeline from updating your profile in real time, which is essential if the app already shared an initial data snapshot with a broker.
Important: in 2026, some Android phones include “permission auto-reset” and “privacy dashboard” features. Make sure the auto-reset is turned on, so the app can no longer silently re-acquire permissions by telling you system-level grants are required for a “core feature.”
Step 3: Revoke Third-Party Sharing Directly in the App’s Data Settings
System permissions only control what the app can access on your device. They do not automatically retract data already transmitted to third parties. Review the app’s list of connected services — this often appears under “Connected Apps,” “Data Providers,” or “Integrations.” Many health apps sync with services such as Apple Health, Google Fit, wearables, and cloud storage. If you see third-party names you do not recognize, remove the connection.
For apps that have an account-based consent portal, log in on the web and look for “Authorized Applications.” Cancel every access token for the health app. This is especially important when you installed the app through an SSO account (such as “Sign in with Google”), because the authorization can live on the identity provider rather than inside the app itself.
Step 4: Use Your Region’s Legal Revocation Shortcut
Consent withdrawal is not only a technical action. Under the GDPR, the CCPA/CPRA, and many newer state privacy laws, you have the right to revoke consent at any time, and the controller must stop processing your data without undue delay. In the United States, the FTC has also increased enforcement around deceptive consent flows, and health data is treated with heightened scrutiny.
To use this as a shortcut, draft a short privacy request email to the app’s data protection officer or support address. Use plain language: “I withdraw my consent to any processing or sharing of my data beyond what is required for the app’s core service. Please identify all third parties with whom my data was shared since my original agreement and confirm that sharing has stopped.” Send it, save the proof, and follow up within 7 business days. If the app has a dedicated “exercise my privacy rights” button in its settings, use that instead of email — it may trigger a faster, automated response.
Step 5: Request a Full Data Deletion and Obtain Written Confirmation
Withdrawing consent is not the same as deleting your data. Once consent is revoked, you have the stronger right to ask for deletion. In the app’s settings, search for “delete my account,” “erase all health data,” or “request data removal.” Be prepared for the app to ask you to confirm multiple times. Do not be discouraged; that confirmation is often a dark-pattern step to make you change your mind.
After you complete the deletion, ask for a written confirmation that the data was permanently removed from backups and archives. In some jurisdictions, companies must respond within 30 days and may be required to tell you if they transferred your data to a third party. Requesting that confirmation creates an audit trail that could be useful if you later need to file a complaint with a data protection authority.
What to Do If There Is No In-App Revocation Option
Some health apps make consent withdrawal intentionally difficult. If you cannot find any privacy dashboard, remove the app from your device anyway, then use your permission history. On iPhone, go to Privacy & Security → Tracking → and check for any recorded tracking permission granted to the app. On Android, use the Privacy Dashboard to see which permissions have been used recently.
Next, contact the app developer via email and explicitly state that you never intended to consent, assuming you made this error during a rushed onboarding. Mention the exact date and time if possible. Use the words “I withdraw consent” and “this is a privacy request, not a support ticket.” If the company has a consumer arbitration clause or a privacy policy that requires a specific form, follow that form. Many apps now offer an “opt out of sale” link in the footer of their homepage, which you can use even if you are no longer logged in.
Avoid the Consent Trap Next Time Without Losing Useful Features
After you have revoked access, you may want to install another health app. Do not let this experience make you avoid valuable health tracking altogether. Instead, adjust your approach:
- Read the first two lines of every consent screen — not the whole policy, just the plain-language summary.
- Look for an “optional” tab next to “Required.” Many apps let you use the core tracker without sharing data with advertisers.
- Use a burner email or Apple Hide My Email / Google sign-in with a masked alias.
- Turn on automatic permission resets and check your privacy dashboard once a month.
- Search for “data broker opt out” lists and request removal from the largest brokers that operate in your region.
None of these steps require you to become a privacy expert. They simply build a routine so that consent never slips through a finger tap again.
Conclusion
Accidentally agreeing to a health app’s data-sharing terms is not a life sentence. By moving through the app’s privacy dashboard, revoking system permissions, removing third-party connections, invoking your legal rights, and requesting a full deletion, you can stop the data pipeline before a broker profits from it. The key is to act immediately, because every minute of delayed withdrawal makes the job of recovering your data harder.