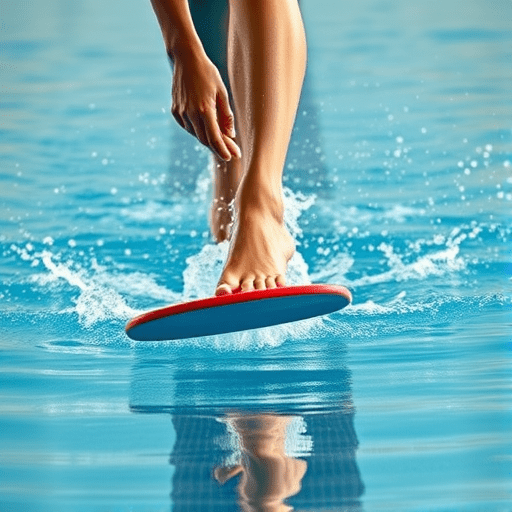
You don’t expect the pool to fix your bike, and you probably don’t expect a kickboard to fix your knee. But the one swimming drill that prevents cycling knee pain is hiding in plain sight at every swim lap lane: the flutter kick with a kickboard. A simple, structured ten-minute set of flutter kicks strengthens the vastus medialis oblique (VMO)—the teardrop-shaped muscle on the inside of your thigh—and pulls your kneecap back into balanced tracking. If you’re an endurance cyclist whose knee starts aching after long miles or hard interval blocks, this is the cross-training drill you’ve been missing.
Why Cyclists Develop Patellar Pain Despite Strong Quads
Cyclists almost never have weak legs. The problem is uneven distribution of strength. The vastus lateralis on the outside of the thigh and the rectus femoris in the middle of the thigh absorb most of the workload from pedaling, and they get bigger and tighter over time. Meanwhile, the VMO—the muscle responsible for pulling the patella medially and keeping it on track—gets disproportionately left behind. Because the VMO is primarily a stabilizer, it fatigues early and often fails to fire at the exact moment the knee needs it most.
This muscular imbalance leads to patellofemoral pain syndrome, which you feel as a dull ache behind or around the kneecap, especially when climbing, pushing a big gear, or standing up out of the saddle. A bike fitter might raise your saddle or adjust your cleats, and that helps, but it doesn’t address the root issue: your VMO is under-trained for the specific task of controlling kneecap glide under heavy, repetitive load.
The Range-of-Motion Problem That Cycling Ignored
Cycling’s pedal stroke is a closed-chain movement: your foot is locked to the pedal, and the knee never achieves full extension. The VMO is most active during the last 15 degrees of knee extension—the “snap” range. Cycling typically keeps the knee in a range from about 30 degrees flexion to around 10 degrees short of full lockout. That means the bike systematically skips the exact range of motion that trains your VMO to do its job. Even if you own a full garage of strength equipment, few machines replicate fast, repeated end-range extension in an open-chain position without loading the joint painfully.
The flutter kick, by contrast, is an open-chain movement with full knee travel. When you flutter kick with a kickboard, your hip is stable, your ankle is free, and every kick sends the knee from roughly 90 degrees of flexion all the way to complete extension. The water resists the kick on both the way down and the way up, so the VMO is loaded continuously through that critical final phase.
Why the Kickboard Flutter Kick Is the Perfect VMO Drill
The kickboard removes the upper-body involvement that normally masks lower-body weakness in swimming. Hold the board lightly by the top edges, and you’ve effectively isolated your legs. From a biomechanics perspective, the flutter kick offers three things cycling can’t.
- Dynamic resistance at end-range: Water pushes back hardest exactly when the knee is straightening, which forces the VMO to work in its terminal range.
- Continuous repetition: You will complete dozens of knee extensions per 25-meter length. No gym set can match that volume without adding joint compression.
- Pain-free environment: Buoyancy unloads body weight while still offering resistance, making the drill easy on irritated patellar tendons and ideal for pre-hab or early rehab.
The 10-Minute Kickboard Flutter-Kick Set
This set is short enough to add before or after an easy ride, but it must be done with intent. You need a kickboard, a lane, and a calm attitude. The whole session is ten minutes, broken into three phases.
Phase 1: Ramp-Up (0–2 minutes)
- Hold the kickboard with both hands at the top edge, arms extended in front of you.
- Float on your front with your face down or turned to breathe, and kick easily.
- Focus on short, quick kicks from the hip. Keep your ankles relaxed and toes pointed.
- Effort level: 4/10. This phase is about waking up the VMO, not exhausting the quadriceps.
Phase 2: Build-and-Hold (2–8 minutes)
- Increase your kick tempo steadily over the first 30 seconds until you find a rhythm you can hold.
- Now emphasize the snap: press the top of your foot downward and finish every kick with a slight pause at full knee extension.
- Swim 25-meter lengths, taking 15 seconds at the wall between each. If your pool is shorter, do continuous 30-second kick intervals with 10 seconds rest.
- For the middle three minutes, add swim fins if you have them. The extra surface area increases water resistance and ramps up VMO activation further.
- Effort level: 7/10 by minute six. Keep your hips high and your kick shallow.
Phase 3: Lockout Focus (8–10 minutes)
- Remove the fins and slow your kick down dramatically.
- On each kick, pause deliberately when the leg is fully extended and the kneecap is facing down.
- Think about squeezing the teardrop muscle near your inner knee with each pause.
- Effort level: 5/10. Smoothness wins here; if you feel a burn in the inner quad, you are doing it right.
Three Technique Cues That Make or Break the Drill
Doing a sloppy flutter kick with a kickboard is a waste of ten minutes. Use these cues to keep the VMO in the driver’s seat.
- Snap the knee, but don’t lock it out hard. Hyperextending the knee pushes the joint into a vulnerable position. Instead, aim for a firm, controlled end point where you feel the VMO engage without any discomfort.
- Keep your patellae pointing at the pool floor. If your knees rotate inward or outward during the flutter kick, the VMO cannot perform its stabilizing role. Imagine each kneecap is a headlight aimed straight down into the tile.
- Lift your chest slightly off the board. Pressing your body weight down through the board makes your hips sink and forces you to drive the kick from the hip flexors. Lifting your chest shifts load into the legs and gives the VMO more meaningful resistance per kick.
How to Slot the Flutter-Kick Set into Your Training Week
Two ten-minute sessions per week is the sweet spot. Schedule them after an easy ride or on a recovery day. Avoid doing the flush-kick set immediately before a high-intensity cycling workout—fatigued VMO fibers are less effective at stabilizing the patella, which can temporarily increase pain rather than prevent it. If you already swim for recovery, put the set at the start of the swim while your legs are fresh. If you don’t swim regularly, any local pool with a lap lane works; the drill doesn’t require advanced swimming fitness or a change of equipment beyond the kickboard.
Consistency matters more than intensity. After four to six weeks, you should notice that the knee feels more stable when you stand up to climb, and that you no longer twitch around the kneecap during long hard efforts. This drill isn’t flashy, but it targets the VMO in a way that cycling, running, and even most gym exercises don’t.
The flutter kick looks rudimentary next to a watt-meter workout or a structured strength block, but it solves a specific problem: an off-center kneecap grinding through thousands of pedal revolutions. By giving your VMO the end-range, open-chain, high-repetition work it never gets on the bike, you rebalance the whole quadriceps group and protect the patella before pain turns into a chronic injury. Find a kickboard, find ten minutes, and let the water do the work.