Precision insulin dosing has long been the holy grail for people living with type 1 diabetes, yet most remain reliant on static carb counts and fingerstick calibrations. The good news is that modern wearable glucose monitors generate rich, continuous streams of data — and open-source APIs make it possible to turn that data into dynamic, individualized insulin adjustments. In this tutorial, you’ll learn how to integrate wearable glucose data into precision dosing by building a custom pipeline that pulls real-time sensor readings, runs them through an open-source dosing logic engine, and outputs recommended insulin doses. We’ll use publicly available tools like Nightscout, Tidepool, and the OpenAPS reference algorithms, all of which are mature enough for a production-grade side project in 2026.
Why Open-Source APIs Are the Right Foundation for Precision Dosing
Commercial insulin pumps and closed-loop systems are often black boxes. Open-source APIs, by contrast, give you full visibility into every calculation, from glucose trend extrapolation to insulin-on-board (IOB) estimation. They also democratize access: you don’t need a proprietary developer kit to read your wearable’s data. Most CGMs expose their data either directly or through community-maintained bridges. With a few HTTP requests, you can retrieve a patient’s glucose history, alarm events, and derived metrics like time-in-range and glucose variability. That transparency is essential when you’re adjusting doses — you need to know exactly why a specific insulin unit amount was suggested, not just receive a number.
Before You Start: The Technical Stack
To follow this tutorial, you’ll need a few pieces in place:
- A Continuous Glucose Monitor (CGM) that shares data via a cloud service — Dexcom G7, FreeStyle Libre 3, or any Nightscout-compatible wearable.
- A Nightscout site (or a Tidepool account) as your aggregation layer. Nightscout is the de facto open-source platform for CGM data and exposes a simple REST API.
- Python 3.10 or later for writing the integration script. We’ll use the
requestslibrary for API calls and a lightweight JSON parser. - A local or remote compute runtime — a Raspberry Pi, a small cloud VM, or even a cloud function that runs on a schedule.
- Access to an open-source dosing engine. The OpenAPS oref0 algorithm is a good starting point, but for this guide we’ll focus on the core dosing decision logic that can be reimplemented in a few hundred lines of Python.
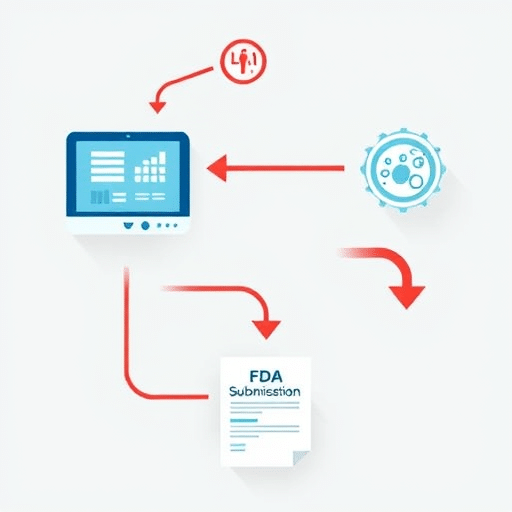
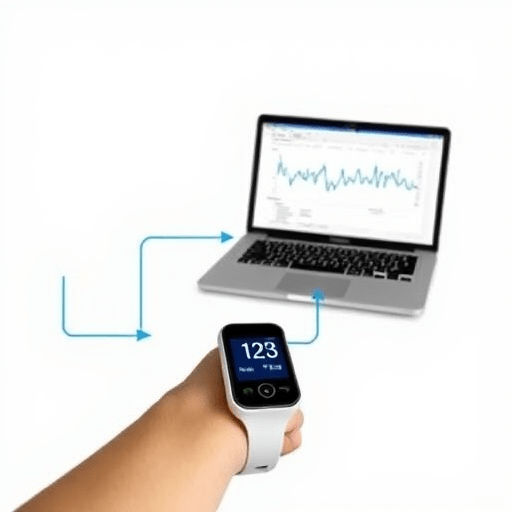
Once you have these pieces, you’re ready to build the integration. The overall flow looks like this: CGM → cloud API (Nightscout) → your Python service → dosing calculation → output recommendation → optional pump or manual delivery.
Step 1: Pull Glucose Data from Nightscout Using Its REST API
Nightscout exposes an API endpoint called /api/v1/entries that returns glucose readings in reverse chronological order. To get recent data, you can use parameters like ?count=120&units=mg/dl. You’ll also need an API token for security, which you create in the Nightscout admin console. A simple request looks like this:
import requests
import os

BASE_URL = "https://your-site.herokuapp.com"
API_SECRET = os.getenv("NIGHTSCOUT_API_TOKEN")

headers = {"api-secret": API_SECRET}
params = {"count": 120, "units": "mg/dl"}

response = requests.get(f"{BASE_URL}/api/v1/entries", headers=headers, params=params)
glucose_entries = response.json()
Each entry contains fields like sgv (sensor glucose value), date (epoch timestamp), and direction (trend arrow). For precision dosing, you’ll want at least the last 30–60 minutes of data to estimate glucose velocity. The direction field, which can be values like “Flat”, “FortyFiveUp”, or “DualUp”, is particularly useful for predicting near-term glucose excursions.
Step 2: Convert Raw Glucose Readings into a Dosing Input Vector
Insulin dosing algorithms don’t work with raw glucose values alone. You need to derive specific inputs:
- Current glucose (mg/dl): the most recent reading.
- Rate of change (ROC): calculate the slope over the last 15–30 minutes. This is more reliable than a single trend arrow.
- Insulin on board (IOB): the amount of active insulin still working from previous doses. You can either get this from a pump or track it manually with a simple decay model.
- Carbohydrates on board (COB): if the person has eaten recently, you need to account for carbs that are still being absorbed.
Here’s how to compute ROC with Python, taking the last six entries (each ~5 minutes apart):
from datetime import datetime

def compute_roc(entries):
    times = []
    values = []
    for entry in entries[:6]:
        times.append(datetime.fromtimestamp(entry["date"] / 1000))
        values.append(entry["sgv"])
    # ensure chronological order
    times.reverse()
    values.reverse()
    if len(times) < 2:
        return 0
    delta_minutes = (times[-1] - times[0]).total_seconds() / 60
    delta_glucose = values[-1] - values[0]
    return delta_glucose / max(delta_minutes, 1)
Your dosing engine will use this ROC to scale the correction factor. For example, a glucose level rising at 2 mg/dl per minute might require a more aggressive correction dose than a stable level.
Step 3: Implement the Precision Dosing Logic with an Open-Source Reference
Rather than reinventing the wheel, you can adapt the dosing math from the OpenAPS oref0 project. Its algorithm uses a set of configurable parameters:
- Insulin sensitivity factor (ISF) — how much one unit of insulin lowers glucose.
- Carb ratio (CR) — grams of carbs covered by one unit.
- Target glucose range — typically 100–120 mg/dl.
- Max basal rate and max bolus — safety limits.
The core formula for a corrective dose when glucose is above target is:
correction = (current_glucose - target_glucose) / ISF + (current_glucose - previous_glucose) / (ISF * 0.05) * sensitivity_factorBut for 2026, you can do better. Instead of a static sensitivity factor, you can dynamically adjust it using historical data. Open-source projects like gluco or dosing-optimizer offer models that personalize ISF based on factors like time of day, activity, and recent glucose variability. For this tutorial, we'll keep it simple: use a moving average of the last 24 hours' glucose values to calculate a time-varying sensitivity coefficient.
def calculate_dose(current_glucose, target, isf, roc, iob, basal_rate):
    correction = (current_glucose - target) / isf
    correction -= iob  # subtract active insulin
    correction += (roc * 0.5) * (current_glucose / 150)  # trend-based adjustment
    # Prevent overstacking
    correction = max(0, correction - basal_rate)
    return round(correction, 2)
This function returns the additional units of insulin needed beyond the patient's basal rate. You can tune the 0.5 factor to match the person's physiological response, which is exactly what precision dosing is about.
Step 4: Send the Adjusted Dose to Your Delivery System
Once you have a dose recommendation, you need a way to act on it. There are two common approaches:
- Manual guidance: the script outputs a suggestion that the user confirms in a mobile app or an Apple Watch notification.
- Automated delivery: you write the dose to a compatible insulin pump via an OpenAPS-like loop. Most do-it-yourself loops use the
oref0decision protocol and an HTTP API on a Raspberry Pi connected to the pump.
For automated delivery, you can use the /openaps/latest endpoint exposed by the OpenAPS instance. That endpoint accepts a JSON payload with current glucose, iob, and target_bg, and returns a recommended temp basal rate. Your integration script can simply call it after computing the input vector:
dose_payload = {
    "glucose": current_glucose,
    "iob": iob,
    "target_bg": target,
    "isf": isf,
    "carb_ratio": cr
}
response = requests.post("http://openaps-host:port/openaps/latest", json=dose_payload)
If you're building a manual system, you can output the dose recommendation as a simple text string or push it to a webhook. The important thing is that the data flow is bidirectional: you get glucose from the wearable, compute a dose, and then log that dose back into Nightscout so the algorithm learns from the outcome.
Step 5: Handle Real-World Data Quality Issues
Wearable glucose data is messy. Sensors can drop out for 15 minutes, produce spikes from pressure on the site, or lag behind venous glucose during rapid changes. Before your algorithm trusts every reading, apply these safeguards:
- Filter out values outside a plausible physiological range (below 40 mg/dl or above 400 mg/dl).
- Ignore readings with a
noisefield greater than 2, which Nightscout marks as high noise. - Require at least two recent readings in the last 10 minutes before computing a dose.
- Cap the maximum dose based on the patient's configured limit — safety always beats algorithmic optimization.
You also need to account for the sensor lag, which is particularly critical for trend-based dosing. A good rule of thumb is to use a 10–15 minute lead time in your ROC calculation, meaning you compare the glucose value from 10 minutes ago to the current value, rather than the most recent 5-minute step. This overcomes the delay inherent in interstitial glucose sensors.
Security, Privacy, and Regulatory Checkpoints
Even in a DIY context, you're handling sensitive health data. Use HTTPS for all API calls, store API secrets in environment variables, and never log raw glucose values without de-identifying them first. If you plan to use this system beyond personal experimentation, be aware that insulin dosing algorithms are regulated medical devices in many jurisdictions. In the U.S., the FDA has engaged with the open-source community, but you should still clearly label your tool as a non-commercial, non-certified research prototype. The purpose of this tutorial is educational, not a substitute for professional medical advice.
Testing and Iterating with Historical Glucose Data
Before you trust your integration with real insulin, run a backtest using a month of historical CGM data. Most Nightscout sites allow you to export data as CSV, or you can query the API for a time range. Write a script that replays old glucose readings through your dosing function and compares the recommended doses to what actually happened. If your algorithm would have missed a severe low or overcorrected a high, adjust your parameters. This step is where precision dosing truly pays off — instead of treating every patient the same, you're continuously refining the model to match their individual glucose dynamics.
Conclusion
Integrating wearable glucose data into precision dosing is no longer confined to academic labs or proprietary platforms. With open-source APIs like Nightscout and a few hundred lines of Python, you can build a system that reads real-time sensor data, calculates a personalized insulin dose, and delivers it safely — all under your own control. The steps outlined here give you a solid foundation, but the real value comes from your own iteration: tuning the sensitivity coefficients, validating against historical data, and slowly expanding the system's autonomy. By doing so, you'll turn a passive glucose monitor into an active partner in daily diabetes management, one carefully adjusted unit at a time.