When you plan water caches in the backcountry, you are essentially engineering a personal supply chain across some of the most unforgiving terrain on Earth. For desert hikers, every liter matters, and a poorly placed cache can turn a dream route into a survival situation. This guide moves beyond generic advice to show you how to design a cache network that is reliable, discrete, and sustainable—using modern terrain data and time-tested backcountry wisdom.
Step 1: Calculate Your True Water Demand for Each Segment
Most hikers use a simple rule of thumb: one liter per four miles. But that figure ignores the extreme variability of desert conditions. To plan water caches effectively, you need to calculate demand not by distance alone, but by heat load, elevation change, and your own sweat rate from previous hikes. For a fixed route, break the trail into 10- to 15-mile segments and assign a specific water requirement to each.
- Heat index factor: Add 15% to your baseline consumption for every 5°F above 90°F in direct sun.
- Elevation gain: For every 1,000 feet of cumulative climb per day, add an extra 300–500 ml.
- Personal sweat rate: Weigh yourself before and after a training hike to calculate liters lost per hour.
- Shaded terrain: If your route passes through tight canyons or dense Joshua tree forests, reduce the estimate by up to 10%.
Once you have a per-segment water budget, add a 30% safety margin. That margin is not for drinking extra—it is for emergency delays, container leaks, or the occasional lost cache location. The final number becomes your target storage volume for each watering point along the trail.
Step 2: Use Terrain and Shade Analysis to Narrow Cache Zones
After you know how much water to place, the next challenge is choosing where. Many hikers pick a spot near a obvious landmark like a cairn or a fork in the trail. But those are exactly the places other people will find—or accidentally disturb. Instead, use satellite imagery and topographic maps to identify microzones with natural shade and subdued foot traffic.
Open-source tools like CalTopo or Gaia GPS let you overlay sun exposure angles for a specific date. On a February hike in the Sonoran Desert, a north-facing slope can stay 15°F cooler than the surrounding flats. That shade reduces evaporation and keeps your cache cooler for the first few hours. More importantly, a shaded and visually complex area makes your hidden water bladder far less obvious to casual passersby.
When marking a cache zone on your map, do not rely on a single GPS point. Instead, define a 50-meter radius where you will search during the actual placement. This prevents the common problem of a coordinate that points to a cliff face or a dense mesquite thicket. If possible, visit the site during the same season and time of day you plan to hike through, so the lighting and landmarks match what you will see later.
Step 3: Choose Cache Sites That Resist Wildlife and Weather
Desert animals like rodents, coyotes, and even ravens are remarkably skilled at breaking into water supplies. A screw-top plastic bottle alone will not survive a determined javelina. You need to design your cache site as a wildlife-resistant unit.
- Elevated placement: Hang your cache from a sturdy branch or rock ledge at least 5 feet off the ground. This keeps it away from most ground-dwelling rodents and snakes.
- Reinforced containers: Use 4- to 6-mil contractor bags inside a rigid PVC pipe or metal ammo can. The flexible outer bag distributes pressure, while the rigid shell protects against teeth and sharp rocks.
- Odor control: Wash all containers with unscented soap and rinse thoroughly. No food wrappers or flavored electrolyte packets near the water—these attract animals.
- Flood awareness: Never place caches at the bottom of a dry waterfall or inside a narrow wash. A single thunderstorm can reposition your cache a mile downstream. Choose high benches at least 10 feet above the highest water mark, which you can identify by lichen lines on nearby boulders.
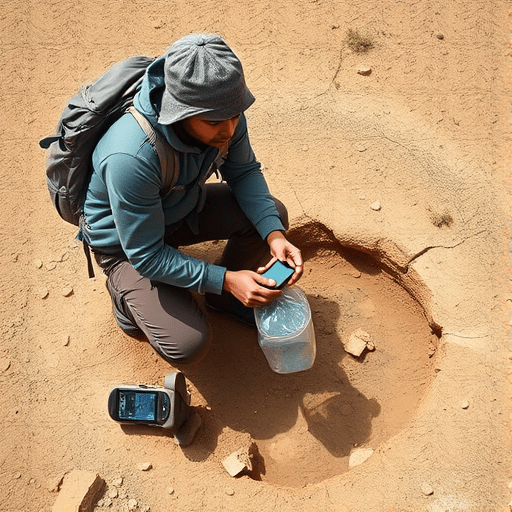
A useful trick is to burry your cache in a dry, rocky slope rather than leaving it exposed. Dig a shallow pit, line it with a layer of coarse gravel, place the sealed water container inside, and cover with the original soil and rocks. The ground acts as an insulator and hides the cache from both animals and other hikers. Mark the spot with a small, unnatural arrangement of stones that only you will recognize—such as three stacked rocks with a single dark streak.
Step 4: Select Containers and Burying Techniques for Long-Term Storage
The container you choose affects more than durability. It also determines how much water you can comfortably hide and how easy it is to verify before your trip. For multi-week caches, the best option is a 5- or 7-gallon collapsible water bladder that fits inside a hard plastic storage box. The bladder takes up minimal space when empty, and the box provides structure for burial.
Before you bury or hide the container, fill it to 90% capacity. The remaining headroom allows for thermal expansion when the desert sun heats the plastic. Seal the bladder inside two layers of 6-mil trash bags, each with its own knot. Then place the bagged bladder inside the box with a small piece of sorbothane foam under each corner to dampen the effects of burrowing animals pressing against the walls.
If you prefer lighter single-use caches for a shorter trek, 1.5-liter frozen juice concentrate bottles work well. They are thick-walled, have a wide mouth for filling, and are widely available. Freeze the water before you hide it—a frozen block takes longer to warm up and stays palatable for up to 48 hours. But remember: frozen water can crack the bottle if you fill it completely. Leave a 2-inch air gap and wrap the bottle in a cloth before burial to absorb condensation.
Step 5: Coordinate Caches with Digital Tools and Community Data
Modern backcountry caches are not just physical objects; they are data points in a personal route network. Use a dedicated GPS app to log each cache location with a unique name, a code snippet, and a photo of the exact hiding spot. Avoid sharing the coordinates publicly, as public cache lists are often raided or vandalized.
Some desert hiking communities maintain private databases of unofficial water caches left by previous hikers. These can be valuable, but treat them as secondary. A cache that someone else placed may be dry, contaminated, or recently moved by animals. Before relying on another hiker’s cache, email the person who last logged it and ask for details. If you cannot verify its integrity, plan to bring your own water for that segment anyway.
A better approach is to use your own digital cache map as part of a larger trip plan. Create a spreadsheet with columns for segment start, expected arrival date, water needed, cache volume, and backup options. Then export that data to your GPS device. When you reach the expected cache zone, your device guides you to the center of the radius. The last 50 meters should be walked slowly, scanning for your rock marker or a slight mound of recently disturbed soil.
Step 6: Test, Maintain, and Revisit Your Cache Network
Water caching is a dynamic process, not a one-time setup. Conditions change—animals find your hidden stash, flash floods alter the terrain, or your own route needs shift due to fire closures. A reliable cache network requires a maintenance loop.
- Test a sample: Before your main trip, set out one test cache in a similar desert environment for two weeks. Weigh the container before and after to measure evaporation loss. Taste the water to detect any plastic leachates.
- Refresh your coordinates: If you move a cache because of animal interference, update your GPS log immediately. Leave a small note in your trip plan marking the old spot as inactive.
- Schedule seasonal checks: For long-term caches that you use multiple times a year, plan a maintenance day in late spring and early fall. Replace any container that shows cracking or sun damage.
- Pack out what you don’t use: If you complete a segment with extra water, do not pour it into the gravel. Carry it to the next camp and add it to your evening hydration.
One effective trick is to photograph each cache site from three angles—at ground level, from 5 feet high, and from behind the nearest large rock. Store these photos in your GPS app. They give you a third-person view that eliminates the tunnel vision you often have when walking a dusty, heat-dazed trail.
The Practical Ethics of Water Caching
Every water cache you place has an impact on the desert landscape. Buried materials, even if wildlife-proof, leave traces. To minimize your footprint, use only containers that are designed for long-term burial, and always dig out your cache at the end of the hiking season. Do not leave a hidden water supply for “emergencies” that may never happen—an abandoned cache becomes litter and a hazard for animals that learn to chew through plastic.
If you choose to use a community cache, respect the caretaker’s rules. Many desert rangers permit private caches on public land, but require them to be removed within a certain number of days. Check the local land management agency’s website before you place anything. A fine for an unpermitted cache is not worth the convenience.
Finally, approach your cache network as a living system. The best desert hikers are not just athletes; they are logisticians who understand the interplay of sun, rock, wildlife, and their own physiology. With careful planning, your water caches will feel almost invisible—until you reach that dry stretch at noon and crack open a cool, clean bottle that you placed for yourself weeks earlier.
That quiet moment of connection between your past planning and your present need is what makes desert backcountry travel so rewarding. By following these steps, you turn an abstract idea—hiding water in the middle of nowhere—into a precise, repeatable discipline that supports every mile of your journey.