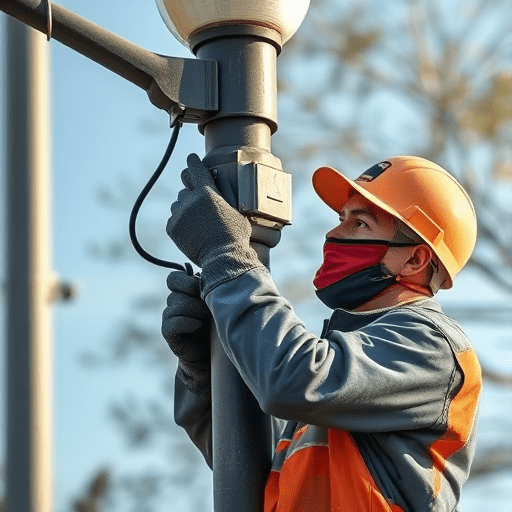
For cities that want to become smarter without funding a brand-new network, learning how to retrofit old streetlights into IoT sensors on a tight budget is the most pragmatic infrastructure project of the decade. This step-by-step legacy infrastructure upgrade guide will help you turn existing poles into environmental monitoring nodes, traffic counters, and flood detectors while spending a fraction of what a purpose-built smart city sensor network would cost. The streetlight is already there—it has power, height, and a citywide footprint. The only question is how to unlock that hidden capacity without redesigning the entire street grid.
Unlike greenfield smart city installations, retrofitting legacy streetlights forces you to work around older wiring, odd fixture shapes, and decades-old regulatory boundaries. But those constraints are exactly why the retrofit approach is so attractive: it preserves sunk municipal assets, avoids expensive pole replacement, and can be deployed in phases. With modular sensor pods, open-source firmware, and low-power wide-area networking, even a district with a very lean operating budget can begin collecting useful environmental and urban data within weeks.
Why Retrofitting Beats Replacing Legacy Infrastructure
Replacing a streetlight pole with a dedicated smart city mast can cost anywhere from $5,000 to $15,000 per location when you include permitting, excavation, new foundations, and disposal of the old structure. Retrofitting an existing pole with a sensor pod usually costs significantly less—often under $800 per node using today’s off-the-shelf components. More importantly, retrofitting preserves the historic character of older neighborhoods, avoids disrupting buried infrastructure, and reduces the embodied carbon footprint of the project.
Another major advantage is speed. A retrofit kit can be installed in less than an hour by two trained workers, sometimes without even closing a lane. That means you can pilot a full sensor network across a commercial corridor in a matter of days, rather than waiting months for civil engineering work. The result is a low-risk path to test hypotheses about where the city actually needs more permanent sensing and data management.
Step 1: Audit Your Existing Streetlight Fleet Before Buying Anything
Before you purchase a single sensor, inspect the physical and electrical state of the streetlight poles you intend to use. A well-intentioned retrofit can fail quickly if the pole is rusted, the wiring is undersized, or the photocontrol socket is too worn to maintain a reliable connection. Walk along each candidate corridor and record the following:
- Pole and fixture type: Cobra-head, decorative, or floodlight? Measure the mounting height and the distance to nearby obstacles.
- Electrical feed: Is there a constant-voltage power source available at the top of the pole? Most streetlights use a photocontrol or twist-lock receptacle that can supply line voltage.
- Control protocol: Does the fixture have a standard ANSI C136.41 photocontrol socket, or does it use a proprietary timer and relay?
- Structural integrity: Look for rust, exposed cables, leaking capacitors, or obvious vibration from heavy traffic. If the pole is in poor shape, skip it and select another.
- Connectivity baseline: Check whether fiber or a cellular signal is available near the pole. If you plan to use LoRaWAN, even a weak signal may be enough, but you need a nearby gateway to collect the data.
This audit is also the right time to identify which streetlights are already LED-retrofitted. LED fixtures often have a separate constant-current driver that can feed a low-power sensor pod. Older high-pressure sodium fixtures may require an external power tap or a battery-assisted module. Knowing this mix ahead of time prevents ordering one universal kit that cannot serve half your fleet.
Step 2: Choose a Sensor Pod Architecture That Fits Your Budget
Once the audit is complete, design a sensor pod that matches your specific use cases. Resist the urge to put every possible sensor on every pole. A tight budget means you should select a small set of high-value measurements and leave room to expand later. Common starter choices include:
- Microclimate sensors for temperature, humidity, barometric pressure, and rain onset.
- Air quality monitors for particulate matter (PM2.5), nitrogen dioxide, and ozone.
- Acoustic sensors for noise-level mapping, gunshot detection, and wildlife monitoring.
- Passive infrared (PIR) motion sensors for pedestrian and vehicle presence counting.
- Ultrasonic or radar distance sensors for flood level detection and refuse-bin fill monitoring.
For connectivity, low-power wide-area networking (LPWAN) is the most budget-friendly option. LoRaWAN works well in dense urban environments and does not require a monthly cellular data plan per node. If your city already operates a LoRaWAN gateway network, you can piggyback on it immediately. For corner cases with heavy interference, LTE-M or NB-IoT may be worth the extra cost, but keep those few nodes separate from the main fleet to control recurring fees.
Power the Sensor Without Ripping Open the Panel
The elegant way to power a retrofit sensor is to use the photocontrol socket. Most modern streetlights have an ANSI C136.41 receptacle on top of the fixture. You can insert a small Y-shaped splitter or a “multipurpose control device” that provides both relay control of the light and a regulated 12V or 24V source for the sensor pod. This creates a safe, code-compliant connection point. If your streetlights have no accessible socket, consider an external power tap mounted through a weatherproof conduit fitting. Battery-assisted solar pods are another option, but they typically need a larger form factor and more maintenance, so use them only for poles without reliable power.
Step 3: Install the Retrofit Kit Without Creating New Hazards
Installation should be treated as live electrical work, not a simple screwdriver task. Use a qualified electrician or train municipal crews according to your utility’s safety standards. The key is to keep the retrofit modular so that future firmware or hardware upgrades do not require removing the entire pole assembly. A typical installation workflow looks like this:
- De-energize the streetlight circuit at the breaker or via the remote control switch.
- Replace the existing photocontrol with a compatible adapter that has a spare output for the sensor pod.
- Mount the sensor pod to the underside of the fixture arm or bracket using stainless steel clamps and anti-vibration washers.
- Route the communication antenna away from metal surfaces and orient it toward the nearest gateway.
- Re-energize the circuit and verify that the streetlight still switches on and off per schedule.
- Pair the sensor with the network, run a baseline calibration, and confirm data is flowing to your dashboard.
Pay special attention to surge protection. Streetlight circuits are exposed to lightning transients and power line noise, and a single surge can destroy an entire row of sensor boards. Use a surge-protected power supply inside the sensor pod, and consider adding a signal-level protector on the antenna line. Pour common mode chokes into the DC power cable before it enters the pod to reduce interference from the LED driver.
Step 4: Connect, Secure, and Normalize the Data
After the physical installation, you need to get the data to the people who will act on it. This is often where smart city projects stumble, not because of hardware failure but because of data silos. Set up a central data pipeline that ingests MQTT, JSON, and CSV exports from your LoRaWAN gateway and stores them in a common time-series database. Use open standards for all downstream integrations so that the sensor data can share a single API with your streetlight controls, asset management, and 311 ticketing systems.
Security cannot be an afterthought. Many IoT sensor pods come with default passwords and unencrypted data. Before deploying at scale, mandate the following: TLS or DTLS for data in transit, mutual authentication for device-to-device communication, and a remote firmware update mechanism that lets you patch vulnerabilities quickly. Assign a dedicated token to each sensor pod so that a compromised device cannot be used to access the rest of the network.
Turn Raw Measurements into Easy-to-Consume Visuals
Your first public-facing deliverable does not need to be a full interactive map. Start with a simple dashboard that displays trend lines for temperature, noise, and PM2.5 at each sensor location. Publish the data as an open dataset so local universities, environmental groups, and civic technology volunteers can build their own analyses. That will multiply your return on investment without additional hardware spend.
Step 5: Maintain the Retrofit System and Expand Sensibly
A streetlight retrofit is not a set-and-forget project. Plan for scheduled maintenance once or twice a year. During those checks, clean the sensor vents, inspect the seal for moisture ingress, verify the antenna is still mechanically secure, and test the battery backup if one is present. Keep a stock of common spare parts—at least 5% of your deployed pod inventory—so you can replace a faulty unit on the next maintenance ticket without waiting for procurement.
Use the sensor data itself to guide expansion. If one corridor is showing high traffic counts and elevated noise, consider adding more granular sensor coverage along that route. If another corridor’s sensors are failing due to constant vibrations from heavy trucks, move them to a quieter pole or invest in shock-absorbing mounts. This iterative approach keeps your budget tight because every deployment decision is grounded in operational evidence, not guesswork.
Conclusion
Retrofitting old streetlights into IoT sensors on a tight budget is no longer a fantasy reserved for affluent tech hubs. By auditing existing poles, choosing modular sensor pods, using photocontrol power adapters, and relying on open connectivity standards, municipalities can turn legacy infrastructure into a high-value sensing layer without a massive capital program. The streetlights are already in place, already connected to electricity, and already apart of the city’s civic fabric. All they need is a second, smarter mission.