When you’re trekking alone, every ounce counts. A well‑packed, self‑inflating trekking pad can be the difference between a night of quality rest and a restless, uncomfortable sleep. In this guide, How to Pack a Compact Self‑Inflating Trekking Pad for Solo Backcountry Camps we walk through the latest lightweight pad options, a pre‑packing checklist, step‑by‑step packing instructions, and crucial safety insights tailored to solo hikers in 2026.
Choosing the Right Pad for Solo Use
Solo campers have unique needs: minimal bulk, quick inflation, and reliable support on varied terrain. In 2026, the market offers a handful of top contenders that meet these criteria.
- Uniquely Compact Designs – Pads that fold into a pouch smaller than your sleeping bag’s bag are now common. Look for models with a fold‑flat feature.
- Advanced Materials – Thermoplastic polyurethane (TPU) and silicone blends reduce weight while maintaining durability.
- Self‑Inflation Technology – Integrated inflatable tubes with a one‑hand trigger or a small pump add convenience without bulk.
Pick a pad that balances inflation time (ideally < 30 seconds), weight under 500 g, and maximum comfort rating on a 1–10 scale.
Pre‑Packing Checklist: What You Need
Gear to Include
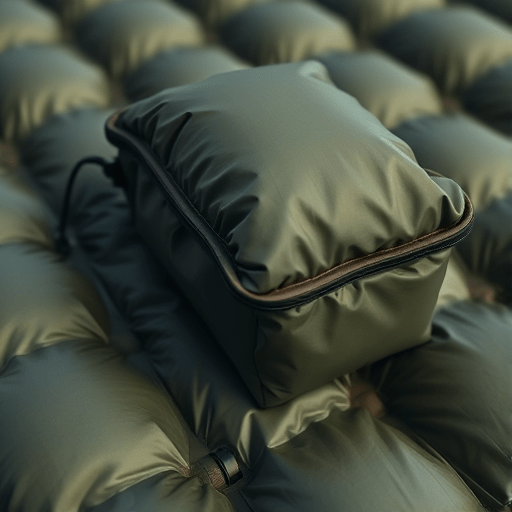
- Self‑inflating pad (unpacked, fully deflated)
- Quick‑inflate valve or pump (if not built‑in)
- Protective rain cover or tarp (optional but recommended)
- Lightweight compression sack or zippered pack‑in‑pack
- Small, sturdy knife or multi‑tool (for field adjustments)
Personal Items to Consider
- Sleeping bag (preferably with a built‑in pad or compatible with the pad’s dimensions)
- Lightweight duffel or daypack (for storing the pad while hiking)
- Quick‑dry microfiber towel (to absorb moisture before packing)
Step‑by‑Step Packing Guide
Step 1: Deflate and Dry
Before packing, ensure the pad is fully deflated and free of water. Gently squeeze out any trapped moisture; a quick press with a microfiber towel will speed this up and reduce weight.
Step 2: Fold Flat Using the Designated Guide
Most modern pads feature a fold‑flat crease. Align the edges, fold twice or thrice as needed, and slide the pad into its own sleeve or an inner pouch. This step keeps the pad flat and protects it from punctures.
Step 3: Wrap in a Protective Cover
For extra protection, wrap the folded pad in a lightweight rain cover or a thin tarp. This shields it from dew or light rain during hikes and adds a layer of insulation.
Step 4: Pack into a Compression Sack
Place the wrapped pad into a zippered compression sack. Squeeze out any remaining air to reduce bulk. For maximum space efficiency, stack the sack inside a larger daypack or a dedicated trekking bag.
Step 5: Secure the Pack in Your Daypack
Use a shoulder strap loop or a dedicated gear pocket to keep the pad near the center of gravity. This placement ensures stability when carrying the pack over uneven terrain.
Weight‑Saving Tips & Hacks
Choose a Self‑Inflating Pad with a Built‑In Valve
Many pads now combine the inflation valve and air chamber into a single unit, eliminating the need for a separate pump or valve kit.
Opt for a Dual‑Layer Pad
A thin inner layer for comfort coupled with a durable outer layer can cut down on weight while still offering protection.
Use a Reusable Compression Bag
Invest in a high‑quality compression bag that can be reused. A bag with a zip lock and a flat bottom compresses the pad evenly, saving up to 20 % in volume.
Pack Light by Reducing Pad Thickness
Many pads offer a “thin” mode; when not inflated to full capacity, you can pack the pad at half its thickness. During a solo trek, this translates into a noticeable weight difference.
Safety & Comfort Considerations
Check for Puncture Resistance
Before each hike, run a quick inspection of the pad’s surface. A small puncture can become a major issue overnight.
Test the Inflation Time
Do a quick test of the inflation system in a controlled setting to confirm it inflates within 30 seconds. Slow inflation can lead to discomfort and wasted time.
Ensure Proper Alignment with Your Sleeping Bag
When packing, align the pad’s dimensions with your sleeping bag’s width and length. Misalignment can cause the pad to shift or compress, reducing support.
Consider Weather‑Specific Adjustments
- In cold weather, add a thin sleeping bag liner to the pad for extra insulation.
- For damp conditions, place a thin, breathable liner between the pad and ground to prevent moisture buildup.
Packing in Extreme Weather Conditions
Cold Nights: Layering the Pad
Use a thermal liner underneath the pad to capture body heat. Many hikers in 2026 use a micro‑down insert that fits directly over the pad.
Hot and Humid Environments: Ventilation Strategies
Position the pad over a rocky or paved surface and keep the lower side vented. Avoid placing the pad over wet moss, as it can create condensation.
High‑Altitude Situations: Weight Management
At high elevations, even a few grams matter. Consider a pad with a built‑in micro‑inflation valve that uses a smaller volume of air, reducing weight while maintaining firmness.
Conclusion
Mastering the art of packing a compact self‑inflating trekking pad for solo backcountry camps means blending the right gear choice with meticulous packing techniques and safety foresight. By selecting a pad designed for solo use, following a systematic packing routine, and applying weight‑saving hacks, you can ensure a comfortable night’s sleep while keeping your pack light and balanced. In the ever‑evolving world of lightweight backpacking gear, staying current with the latest materials and design innovations will keep you well‑prepared for whatever the backcountry throws your way.