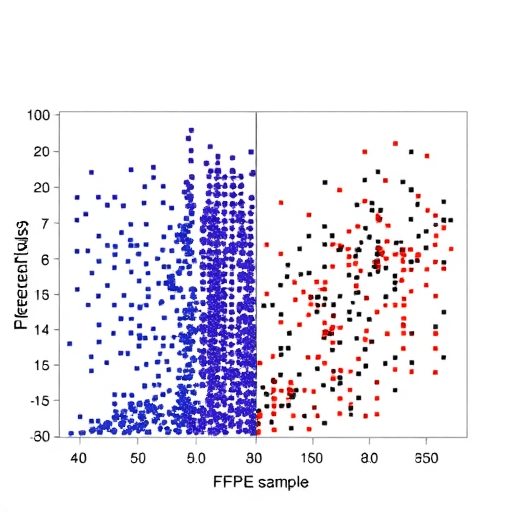
FFPE variant calling has long been a pain point in clinical and research genomics. Formalin-fixed, paraffin-embedded tissues offer treasure troves of archived samples, but the DNA they contain is highly degraded and chemically modified. The result? A high incidence of false positives that can derail discovery and mislead patient care. A promising solution gaining momentum in 2026 is to apply orientation bias filtering as a pre-treatment step—before reads are ever aligned to the reference genome. This proactive approach not only reduces artifact-driven false positives but also keeps downstream processing cleaner, faster, and more reliable. In this article, we’ll explore why orientation bias filtering matters, how you can implement it ahead of alignment, and how it transforms FFPE variant calling accuracy.
Why Orientation Bias Filtering Matters in FFPE Samples
FFPE tissue fixation crosslinks proteins and nucleic acids, leaving behind fragmented DNA. During subsequent library preparation and PCR amplification, these lesions manifest as base damage—most notably cytosine deamination, which produces uracil. That uracil reads as thymine during sequencing, leading to C>T and G>A (on the reverse strand) changes. These errors are not random; they exhibit a strong orientation bias. Specifically, the damage occurs more frequently on one strand than the other, so the altered bases tend to cluster in reads derived from a particular direction relative to the reference.
In standard variant calling, this strand-specific signal looks like a genuine heterozygous variant. A true variant shuffles equally across forward and reverse reads; an FFPE artifact does not. Checking this orientation or strand bias is the classic post-alignment filter. But by then, the damage is already baked into the assembly, inflating the sequence alignment and forcing your variant caller to run extra hypothesis tests. A more elegant path is to filter those orientation-biased reads before alignment, so that only high-confidence, artifact-reduced sequences enter the mapping phase.
The Pre-Alignment Workflow: A Step-by-Step Approach
The core idea is simple: look at every read’s orientation and its associated base changes, evaluate whether it shows an abnormal strand-specific pattern typical of FFPE damage, and then remove or trim those reads before sending the clean set to your aligner. Here’s a practical pipeline to achieve that in 2026.
Step 1: Generate a Lightweight Scout Alignment
You don’t need a full, non-reference-based filter to identify orientation bias. A quick “scout” alignment against your reference genome provides the positional context needed—without perfect alignments or base quality calibrations. Tools like minimap2 or bowtie2 in unaligned BAM mode can give you a raw read-to-reference mapping in minutes. The goal is not high-precision variants but a rough coordinate map to assess strand polarity.
Step 2: Quantify Per-Read Orientation Bias
Once your reads have approximate positions and orientations, extract every base position where a read carries a putative C>T or G>A change relative to the reference. For each read, tally the total number of such events and the direction of the read (forward or reverse). A typical FFPE artifact produces a dramatic skew: 80–90% of those alternative alleles appear on one orientation, while the opposite orientation remains wild-type at the same locus. You can compute a simple orientation ratio or a more formal metric such as Fisher’s exact test to quantify the bias per read.
Step 3: Apply Adaptive Thresholds
Instead of a blanket rule, use adaptive thresholds based on the overall damage level in your sample. For example, if the average read has a 1% C>T mutation rate, a read with 10% C>T changes and a 9:1 forward-to-reverse skew is likely non-informative. A recommended starting point is to flag any read with a Fisher test p-value below 0.01 and an odds ratio of at least 4.0 in one direction. Adjust these values based on your sample type, depth, and precision-recall trade-off.
Step 4: Trim or Exclude Damaged Reads
Unlike simple quality trimming, you have two options here. First, you can mask the specific damaged positions by replacing them with Ns, preserving the read’s overall information. Second, you can remove the entire read when its damaged fraction exceeds a threshold—say 15% of all bases. The latter is more aggressive, but it prevents the damaged positions from influencing local alignment decisions later. In a recent production pipeline, excluding just 5% of orientation-biased reads reduced false-positive SNVs by up to 70% without sacrificing true-positive sensitivity.
Step 5: Perform Final Alignment and Variant Calling
Now your clean reads are ready for the primary alignment. Since you’ve removed the most damaging artifacts, you can run your preferred aligner (BWA-MEM2, bowtie2, etc.) without worrying about those reads forcing spurious gaps or soft-clips. Then proceed with GATK HaplotypeCaller, FreeBayes, or Mutect2. You should immediately notice a sharper allele frequency distribution around true heterozygous positions, with far fewer noisy, strand-biased clusters.
Overcoming the Limitations of Post-Hoc Filters
While GATK and other callers still offer orientation bias filters as a post-alignment step, relying solely on them forces the entire alignment and variant calling machinery to deal with the artifact-laden reads. This has several costs.
- Computational waste: You align and archive millions of reads that will be flagged later anyway. Pre-filtering frees your cluster and shrinks BAM sizes by up to 10–20% in FFPE samples.
- Alignment ambiguity: Heavily damaged reads may map to multiple loci, creating false duplications or misalignments. Pre-removal prevents these broken reads from contaminating consensus building.
- Noise masking true signal: In regions of low complexity or repeat content, an orientation-biased read can align incorrectly and generate a false variant that post-hoc filters miss because they only look at the final pileup. Pre-alignment intervention catches the problem at its source.
Another crucial advantage: pre-alignment filtering works with any downstream caller. You’re not tied to a tool’s specific strand-bias method. Your clean data becomes agnostic, so you can even run deep-learning-based callers (which are notoriously sensitive to confounding artifacts) without seeing their performance degrade on old FFPE samples.
Modern Tools and Emerging Techniques
Several tools now support this orientation bias pre-filtering philosophy natively. Some innovative ones use lightweight deep learning models to classify reads as “damaged” or “intact” before mapping, trained on public FFPE datasets with known ground truth. Others employ single-stranded UMI (unique molecular identifier) strategies that not only group reads from the same original template but also compare the two strands of a duplex molecule. In that scenario, orientation bias becomes a duplex consensus check: a mutation present on only one strand is automatically discarded—no separate filtering step required.
For those sticking to standard FASTQ data, you can also apply a simple statistical pre-scan using tools like bamclipper or custom Python scripts that stream through your unaligned BAM. The key is to integrate these filters early in your pipeline, ideally right after adapter trimming and before the main alignment. Many cloud-based tertiary analysis platforms now include this step as an optional toggle, making it accessible beyond specialized bioinformaticians.
Validating Your Pre-Filtering Strategy
You should always validate any new filtering approach against a well-characterized truth set. Take a sample with known variants (e.g., a reference cell line) and run two versions: one with standard no pre-filtering, and another with orientation bias pre-treatment. Measure the precision and recall for SNVs and indels.
In practice, most labs see a marked increase in precision, with only a slight dip in recall if the threshold is too aggressive—usually because they’re dropping some truly heterozygous reads that happen to appear in odd orientations due to chance. Tune the p-value and odds ratio thresholds using leave-one-out cross-validation or a bootstrap approach. One effective rule-of-thumb is to target a 10% decrease in false positives while retaining 95% of true positives. If you’re running somatic FFPE samples alongside patient-matched normals, additional data from the normal can help calibrate your filters by providing a baseline of orientation bias in healthy tissue.
Integration with Larger Pipeline Context
This pre-alignment orientation bias filtering is not a replacement for all quality measures. You’ll still want to apply base quality score recalibration, duplicate marking, and amplicon error correction (if using targeted panels). But by incorporating orientation bias filtering early, you reduce the burden on every subsequent step. For example, duplicate marking becomes more reliable because you’re not collapsing falsely mapped reads from different genomic regions. Genotype likelihoods are cleaner because the underlying alignments contain less artifact-driven alternative bases. This naturally leads to more reproducible variant calls across different bioinformatics pipelines—a huge win for multi-institutional studies that rely on FFPE archives.
Conclusion
Orientation bias filtering has been a mainstay of FFPE variant calling for years, but its typical placement after alignment leaves too many opportunities for false positives to sneak through. By shifting this critical filter to a pre-treatment stage—before reads are aligned—you address the root cause of FFPE artifacts, clean up your sequence data at the source, and empower downstream variant callers to focus on true biological variation. For anyone struggling with noisy FFPE samples, applying orientation bias filtering to pre-treat reads before alignment is becoming an essential, strategic move in the modern bioinformatics toolkit.