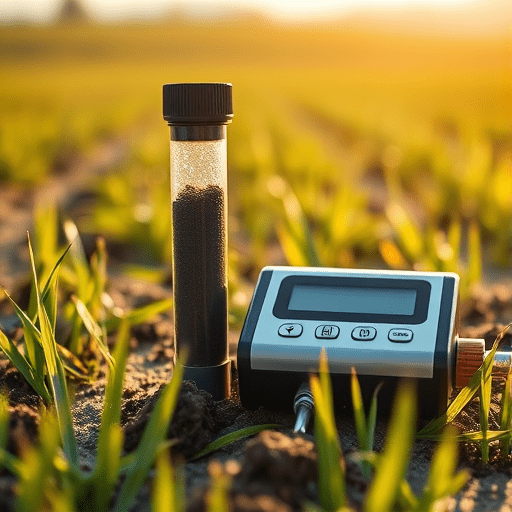
eDNA Soil Testing: A Beginner’s Guide for Regenerative Farms is no longer a futuristic concept. Over the past few years, portable DNA sequencers the size of a large bar of soap have become rugged, affordable, and increasingly accurate. For regenerative farmers, this means the invisible world beneath your feet is finally accessible. Instead of mailing samples to a lab and waiting weeks for a generic chemical soil test, you can now sequence the actual DNA of bacteria, fungi, protozoa, and nematodes on-site. This guide walks you through a practical, step-by-step protocol for using a portable DNA sequencer to assess your soil’s living ecosystem in the current growing season.
Why eDNA Soil Testing Matters for Regenerative Systems
Regenerative agriculture hinges on the idea that healthy soil grows healthy plants. But soil health is not just about nitrogen, phosphorus, and pH. It is about the community of organisms that cycle nutrients, build soil structure, and suppress pathogens. Traditional lab tests measure what is chemically extractable, while eDNA testing captures the biological activity and diversity that truly define a functioning soil.
With a portable sequencer, you can answer questions like: Are my mycorrhizal fungi populations increasing after planting cover crops? Is the ratio of Gram-positive to Gram-negative bacteria shifting as I reduce tillage? Are there potential pathogens that need attention? This kind of biological intelligence turns regenerative management from a leap of faith into an iterative, evidence-based process.
The Portable DNA Sequencer Advantage in 2026
Portable nanopore sequencers, such as the Oxford Nanopore MinION and the newer Flongle, have dropped in price to around $500–$1,000 for the starter kits. Consumables cost as little as $50–$100 per soil sample. Compared to traditional sequencing services that charge $300–$500 per sample and require batch shipping, portable devices let you sequence when you need it. On-farm use also reduces sample degradation because DNA extraction can happen within minutes of collection, preserving a more accurate picture of the living community.
The latest flow cells in 2026 offer higher throughput and lower error rates than earlier versions. For soil eDNA, where you are often identifying taxa by marker genes like 16S rRNA or ITS, the accuracy is now sufficient for species-level resolution in many cases. Cloud-based pipelines also handle the bioinformatics automatically, so you do not need a computer science degree to interpret the results.
Step-by-Step Protocol for On-Farm eDNA Soil Testing
This protocol assumes you have a basic portable sequencer kit, a lightweight field DNA extraction kit, and a laptop or a smartphone with cloud connectivity. It can be completed in a single afternoon, from collecting the first scoop of soil to seeing your first sequencing reads.
Step 1: Plan Your Sampling Strategy
The quality of your results depends on where and how you sample. Define the management zone you want to test: a single field, a specific treatment, or a problem area. Take at least 5–10 cores from each zone, at a consistent depth (e.g., 0–15 cm for most crop systems). Combine the cores in a clean bucket and mix them thoroughly. This composite sample reduces the impact of microbial patchiness.
Keep separate samples if you want to compare different fields or treatments. Label each bag with a unique ID, GPS coordinate, and timestamp. For eDNA work, contamination is your enemy. Wear gloves, use sterilized tools, and avoid touching the soil with bare hands.
Step 2: Collect Soil for eDNA
Use a fresh, sterile soil corer or a trowel that has been wiped with bleach and rinsed. Remove the top layer of plant litter. Push the corer to the desired depth and extract the core. Place each core into a clean Ziploc-style bag or a sterile collection tube. If your portable extraction kit includes a preservation buffer, add it immediately to stop DNA from degrading. For best results, process the sample within 1–2 hours. If you cannot, keep it on ice or in a cool cool box, but avoid freezing as that can break microbial cells and skew community profiles.
Step 3: Extract DNA in the Field
This step is surprisingly compact. Most portable kits use a bead-beating method in a small handheld homogenizer, followed by a silica column or magnetic bead purification. For soil, the two keys are to break open sturdy fungal spores and Gram-positive bacteria, and to efficiently remove humic acids and other PCR inhibitors commonly found in rich organic soil.
Follow the manufacturer’s instructions, but consider these practical tips: add an extra 30 seconds of bead beating for clay-heavy soils; use a higher amount of soil (up to 0.25 g) if your samples are sandy and less organic; and always run a negative extraction control (just buffer, no soil) to catch contamination. The final elution volume is usually 50–100 µL, enough for multiple downstream reactions.
Step 4: Amplify and Barcode (Optional but Recommended)
For targeted soil tests, you will typically amplify a marker gene: 16S rRNA for bacteria and archaea, ITS for fungi, or 18S for protists and some nematodes. Portable thermocyclers like the miniPCR are small, battery-operated, and can run the necessary PCR protocols. Each sample gets a unique barcode (a short DNA sequence) added to the primers. This lets you multiplex many samples on one flow cell, drastically reducing cost per sample.
If you want a more comprehensive view of all DNA in the soil, you can skip PCR and directly sequence the extracted DNA. However, metagenomic sequencing requires more depth and yields complex data that is harder to parse for beginners. Starting with a targeted amplicon approach is klogistically simpler.
Step 5: Load and Run the Portable Sequencer
Before loading, perform a rapid quantification check using a portable fluorometer or, if you are familiar with it, by running your PCR product on a mini gel. You need roughly 50–100 ng of amplified DNA for a nanopore run. Then, follow these general steps:
- Prime the flow cell with the flush buffer to hydrate and stabilize the nanopore membrane.
- Mix your pooled, barcoded amplicons with the sequencing adapters and a motor protein that drives the DNA into the pores.
- Load the mix into the flow cell’s sample port using the supplied syringe or micropipette.
- Connect the device to your laptop and launch the sequencing software.
- Set the run duration to 2–4 hours for a single field’s worth of samples. The software will show the number of active pores and the sequencing speed in real time.
Step 6: Basecall and Analyze
As the sequencer produces raw electrical current signals, the software converts them into DNA sequences (basecalls). In 2026, most onboard basecalling is done live and at high accuracy. Once your run finishes, you will have a set of FASTQ files. For soil eDNA analysis, the most straightforward route is to upload these files to a cloud-based pipeline like the AMPtk, QIIME2, or a commercial service that offers a simple dashboard. These pipelines will:
- Demultiplex your barcoded samples.
- Filter out low-quality reads and chimeras (PCR artifacts).
- Cluster sequences into operational taxonomic units (OTUs) or exact sequence variants (ESVs).
- Assign taxonomy against databases like Greengenes2, Silva, or UNITE.
- Produce a table of taxa abundances for each sample.
Your laptop or smartphone can then visualize the results as bar charts, heatmaps, or beta diversity ordination plots. Some pipelines even generate a “soil health score” based on the relative abundance of indicator taxa, such as Glomeromycota for arbuscular mycorrhizal fungi or the ratio of copiotrophic to oligotrophic bacteria.
Step 7: Interpret and Act
This is where the farm knowledge comes in. A high diversity index is generally a good sign, but the identity of the species matters more. For example, finding a large presence of nitrifiers like Nitrososphaera can explain why your nitrogen management is working, while a spike in plant-pathogenic Fusarium might signal trouble ahead. Compare your results across multiple fields or seasons to track changes in biological function.
Remember that eDNA data is inherently relative, not absolute. A shift in abundance from one sampling date to another can indicate whether your regenerative practices are indeed driving the microbiome toward a more beneficial state. Keep a notebook of your management interventions and pair them with your sequencing results. Over time, patterns will emerge.
Common Pitfalls and How to Avoid Them
Portable sequencing is forgiving, but soil eDNA has a few unique challenges. The first is low DNA yield. If your extraction gives you less than the recommended concentration, concentrate the DNA with a speed-vac or by precipitating with ethanol. The second is contamination from airborne fungal spores, which are everywhere. Always process a blank control and be suspicious of sequences that appear in that control.
The third pitfall is choosing the wrong primer set. Soils contain huge amounts of bacteria, and the standard 16S primers for bacteria can also amplify chloroplast and mitochondrial DNA from plant residues. To get cleaner results, use a primer set that includes a peptide nucleic acid (PNA) blocker to suppress plant DNA. Alternatively, sequence the ITS region for fungi, which has its own set of biases. Be consistent with your primers across all samples so you can compare apples to apples.
Turning eDNA Data into Regenerative Decisions
What you do with the data matters more than the sequencing itself. If eDNA testing reveals low fungal diversity while you are adding compost, you might need to reduce roto-tilling, which is particularly damaging to fungal hyphae. If bacterial diversity is high but nitrogen cycling is obstructed, look for indicators of oxygen stress like anaerobic Clostridium species. If nematicides or frequent pest issues correlate with a drop in soil predators, let that guide your crop rotation and organic amendments.
The goal is not to achieve a perfect score, but to build a biological baseline for each management unit so you can measure trajectories. Repeating the same eDNA test in the same spots every season gives you a growth curve for your soil’s microbial community. That is the kind of evidence that helps regenerative farmers adapt quickly and confidently.
Conclusion
Portable DNA sequencers have transformed eDNA soil testing from a specialist research tool into a practical field instrument for regenerative farms. By following a simple protocol—sample, extract, amplify, sequence, and interpret—you can gain one of the most detailed views of soil life that has ever been available to a farm business. This knowledge puts you in greater control of your agroecosystem, helping you make decisions that nurture the microbial partners at the heart of soil fertility.