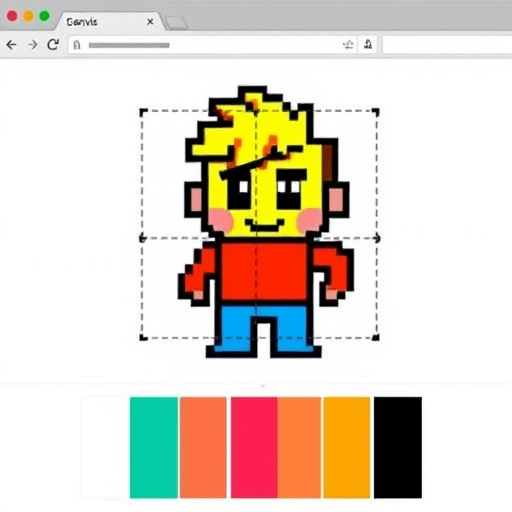
Creating your own pixel art editor with HTML Canvas and JS is one of the most rewarding beginner projects you can tackle in 2026. It teaches you the core mechanics behind every drawing app you’ve ever used — from the mathematics of grid snapping to the careful handling of mouse and touch input. And unlike a generic tutorial, we’ll build an editor that’s touch-friendly and stylus-ready, thanks to modern Pointer Events. By the end, you’ll have a functional pixel art tool that runs entirely in the browser, and you’ll understand exactly how every part works.
Why Build Your Own Pixel Art Editor in 2026?
Browser-based pixel art tools are everywhere, but building your own is different. It strips away the magic and shows you how canvas, JavaScript, and native browser APIs work together. You’ll learn to think in grids, manage drawing state, and handle real-time input — all essential skills if you want to create interactive graphics or games. Plus, with 2026’s focus on offline-friendly and privacy-respecting web apps, a self-contained editor like this fits perfectly. There are no libraries, no frameworks, just pure HTML and JavaScript.
Setting Up the Canvas and Grid
Before we paint a single pixel, we need a canvas and a way to define our grid. For this project, we’ll keep it simple: a 16×16 grid, but the same principles apply to any resolution. The canvas element itself will be sized to match the grid, and we’ll use a CSS rule to make it scale beautifully on high-DPI displays.
HTML Structure
<!DOCTYPE html>
<html lang="en">
<head>
  <meta charset="UTF-8">
  <meta name="viewport" content="width=device-width, initial-scale=1.0">
  <title>Pixel Art Editor</title>
  <style>
    canvas {
      image-rendering: pixelated;
      border: 2px solid #333;
      touch-action: none; /* prevents scroll on touch devices */
      cursor: crosshair;
    }
  </style>
</head>
<body>
  <canvas id="pixelCanvas" width="160" height="160"></canvas>
</body>
</html>
The image-rendering: pixelated keeps our art crisp when scaled, and touch-action: none is critical for pointer events — it tells the browser not to hijack touch gestures. Now, instead of putting the canvas size in the HTML, we’ll set it programmatically later.
Grid Math Essentials
With a 16×16 grid and a canvas of 160×160 pixels, each cell is exactly 10×10 pixels. But instead of hardcoding sizes, we should write this logic cleanly. Here’s the core grid math:
const GRID_SIZE = 16;
const CELL_SIZE = 10;
const canvas = document.getElementById('pixelCanvas');
const ctx = canvas.getContext('2d');

canvas.width = GRID_SIZE * CELL_SIZE;
canvas.height = GRID_SIZE * CELL_SIZE;
This gives us a one-to-one mapping between canvas pixels and grid cells. When we need to draw a cell, we multiply its grid coordinates by CELL_SIZE. To convert a mouse position to a grid cell, we divide the pixel coordinate by CELL_SIZE and round down using Math.floor. This is the heart of pixel art editor logic — Euclidean division in its simplest form.
Handling Pointer and Mouse Events
In older tutorials, you’ll see separate mousedown, mousemove, and mouseup events. But in 2026, the better practice is to use Pointer Events, which unify mouse, touch, and stylus input. This means your editor will work on a laptop, a tablet, or a touchscreen without any extra code. The API is nearly identical to mouse events, but more future-proof.
From Mouse to Pointer Events
let drawing = false;
let currentColor = '#2c3e50';

canvas.addEventListener('pointerdown', (e) => {
  drawing = true;
  paintAt(e);
  canvas.setPointerCapture(e.pointerId);
});

canvas.addEventListener('pointermove', (e) => {
  if (!drawing) return;
  paintAt(e);
});

canvas.addEventListener('pointerup', (e) => {
  drawing = false;
});
The call to setPointerCapture is a small but important detail. It ensures that even if the pointer moves outside the canvas, we still get the pointermove events — this makes drawing smooth and prevents unexpected line breaks.
Mapping Coordinates to Grid Cells
The paintAt function does the actual grid math. We need to subtract the canvas’s bounding rectangle left and top values, then divide by CELL_SIZE:
function paintAt(e) {
  const rect = canvas.getBoundingClientRect();
  const scaleX = canvas.width / rect.width;
  const scaleY = canvas.height / rect.height;

  const mouseX = (e.clientX - rect.left) * scaleX;
  const mouseY = (e.clientY - rect.top) * scaleY;

  const col = Math.floor(mouseX / CELL_SIZE);
  const row = Math.floor(mouseY / CELL_SIZE);

  if (col >= 0 && col < GRID_SIZE && row >= 0 && row < GRID_SIZE) {
    drawCell(row, col, currentColor);
  }
}
The scaling variables (scaleX and scaleY) handle cases where the canvas is visually resized with CSS. They map the actual DOM coordinates back to the internal canvas resolution. This keeps your grid math accurate even if you make the editor responsive — a common stumbling block for beginners.
Painting Pixels with the Canvas API
Now we get to the fun part: drawing pixels. The Canvas API gives us fillRect(x, y, width, height), which is perfect for filling square cells. We also want to keep our artwork in a 2D data array so we can later add save, undo, or export features.
// Data model: 16 rows of 16 cells, initially empty (null)
const grid = Array.from({ length: GRID_SIZE }, () => Array(GRID_SIZE).fill(null));

function drawCell(row, col, color) {
  grid[row][col] = color;
  ctx.fillStyle = color;
  ctx.fillRect(col * CELL_SIZE, row * CELL_SIZE, CELL_SIZE, CELL_SIZE);
}
Using the data model is what separates a “pixel painter” from a true editor. It lets you clear, resize, or export your artwork later. For the initial drawing, we just update both the array and the canvas. One small addition: you might want to draw a subtle grid overlay so the cells are visible when they’re empty. A simple strokeRect loop in a drawGrid() function works well. Just remember to call it after drawing any pixel so the grid lines stay on top.
Making the Editor More Usable
A pixel art editor built for 2026 shouldn’t feel like a toy. Let’s add a few usability features that make the difference between a demo and a tool you’d actually use.
Responsive Layout
Your canvas will scale nicely on different screens if you use CSS to limit its maximum width and keep the aspect ratio. Add a wrapper, set max-width: 80vmin, and let the canvas fill it. The image-rendering: pixelated rule ensures every pixel stays sharp, even when the canvas is upscaled.
.container {
  max-width: 80vmin;
  margin: 0 auto;
}
canvas {
  width: 100%;
  height: auto;
  image-rendering: pixelated;
}
Because we already wrote the paintAt function with scaling in mind, everything works automatically. The grid math adapts to the actual visual size of the canvas.
Adding a Color Palette and Clear Button
No pixel art editor is complete without a color picker and a reset button. We’ll use an HTML input type="color" and a simple button. Here’s the HTML:
<input type="color" id="colorPicker" value="#2c3e50">
<button id="clearBtn">Clear All</button>
The JavaScript is straightforward:
colorPicker.addEventListener('input', (e) => {
  currentColor = e.target.value;
});

clearBtn.addEventListener('click', () => {
  ctx.clearRect(0, 0, canvas.width, canvas.height);
  for (let r = 0; r < GRID_SIZE; r++) {
    for (let c = 0; c < GRID_SIZE; c++) {
      grid[r][c] = null;
    }
  }
  drawGrid();
});
This kind of feature work is what turns a simple canvas demo into a real, useful application. Start with the grid and pointer events; then layer on controls as you go.
What’s Next for Your Canvas Editor?
Building a pixel art editor with HTML Canvas and JS is not just about the final product — it’s about the journey from raw events to structured logic. You’ve learned how to calculate grid positions, handle unified pointer input, and manage a visual state model. In 2026, these are essential skills for creating interactive web experiences that work across all devices. From here, you can extend your editor with undo/redo history, export to PNG, or even turn your pixel art into animated sprites. The foundation you’ve built handles the hard part; the creative possibilities are endless.