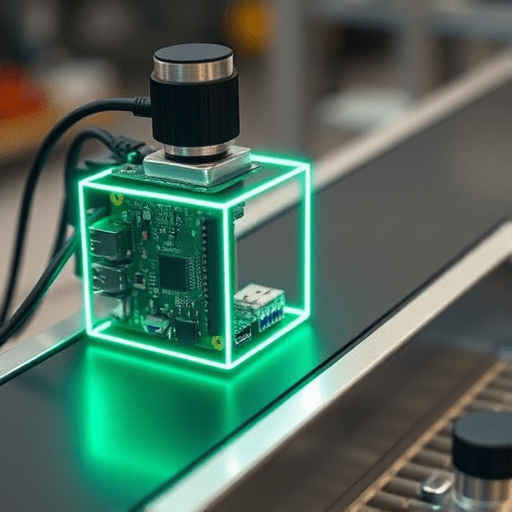
The phrase “YOLO on Raspberry Pi for real-time quality gates” used to sound like a hackathon project. In 2026, it’s a legitimate production pattern for small-batch manufacturers, electronics assemblers, and even farm-scale sorting lines. By pairing a Raspberry Pi’s low-power compute with a carefully pruned and quantized YOLO model, you get an edge vision system that inspects every unit as it passes a conveyor, rejects defects offline, and never sends a single image to the cloud.
This article walks through the practical decisions that matter when building such a system: choosing hardware, preparing a lean model, designing the pass/fail logic, and measuring whether it can keep up with your line speed.
Why Edge Vision Is Replacing the Manual QC Checklist
Manual inspection is slow, inconsistent, and difficult to scale. Most mid-sized production lines still rely on a human operator who visually checks parts at the end of a shift. The result is often a sampling rate below 10 percent, meaning ninety percent of units leave the station untouched.
An offline edge vision system changes the economics of quality control. Because the Raspberry Pi requires no internet connection, it can sit behind a firewall, on a factory floor with spotty Wi-Fi, or inside a mobile inspection cart. The inference cost is near zero after the initial hardware purchase. And with the recent improvements in tiny YOLO architectures, the accuracy gap between a 50 MB industrial model and a 10 MB edge model has narrowed to the point where most defect classes are still caught reliably.
Choosing the Right Raspberry Pi and Camera for the Job
The Raspberry Pi 5 is the realistic starting point for real-time defect detection. Its four-core Cortex-A76 CPU and VideoCore VII GPU handle integer‑8 quantized YOLO models at a stable frame rate. The older Pi 4 can work for simple defect classes, but you will spend a lot of time optimizing and may still bottleneck at 720p resolution.
For imaging, the official Camera Module 3 with a global shutter is the best value for moving parts. A global shutter avoids the skew that a rolling shutter produces on a fast-moving belt. If your field of view requires more distance or better low-light performance, a Raspberry Pi‑compatible USB camera with a CS‑mount lens is a reasonable alternative, but be prepared to handle higher CPU overhead for USB transfer.
Building a Slim YOLO Pipeline for Offline Defect Detection
You do not need the full YOLO suite for a quality gate. Start with a nano‑scale variant such as YOLO11n or YOLOv8n, which gives a strong balance of speed and mean average precision on small object defects. These models consume less than 20 MB of storage after conversion and run comfortably in the Raspberry Pi’s 8 GB memory.
Training data should reflect your full operational variance: different lighting conditions, part orientations, conveyor speeds, and surface finishes. If you only train on clean studio shots, the model will fail the first time a shadow crosses the inspection area. A labeled dataset with at least 1,500 images per defect class is a safe baseline for a two- or three-class quality gate.
Export the trained model to ONNX first, then convert to NCNN or TFLite for on-device inference. NCNN tends to be faster on the Pi’s CPU while TFLite opens the door to the Edge TPU if you later attach a Coral accelerator.
The Quantization and Compilation Workflow That Actually Matters
Quantization is where most naive approaches lose accuracy. Full int8 quantization is tempting because it almost halves the memory footprint, but it can destabilize confidence scores for rare defects. A safer path is to use mixed precision: keep the backbone in float16 and quantize the detection heads to int8. Several small-model projects have shown that this hybrid approach preserves recall on hard examples while still getting an acceptable frame rate.
After quantization, run your validation set through the converted model and compare the average confidence distributions against the original. If the confidence gap is larger than five percent on a critical class, fall back to float16 only. For most defect detection use cases, float16 is still fast enough on the Raspberry Pi 5 when combined with a 640×640 input size.
Designing the Quality Gate Logic: Detection Is Only Half the Problem
A quality gate is not simply a model that draws bounding boxes. It is a decision function that takes the detections and turns them into a reliable pass/fail signal. You need to define three things before writing code:
- Confidence threshold: Usually 0.5 to 0.7 for known defects, but tune it against your false-acceptance cost.
- Minimum box area: A tiny bounding box is often a false positive caused by noise, not a real scratch.
- Temporal voting: Instead of rejecting a part after one frame, run a short window of 3 to 5 frames and reject only if a defect appears in a consistent location across the majority of them.
Temporal voting on the Raspberry Pi is surprisingly useful. It smooths out transient lighting flicker and prevents the system from firing rejection solenoids on a single noisy inference. The downside is a small latency increase, which is fine for most conveyor gates that already have a mechanical settling time.
A Skeleton Python Implementation for the Inspection Loop
Your main loop should be minimal: capture a frame, run inference, evaluate the gate, set a GPIO pin. Avoid doing image saving or dashboard updates inside the loop; they will destroy your determinism.
from picamera2 import Picamera2
import numpy as np
import cv2

picam2 = Picamera2()
config = picam2.create_still_configuration(
    main={"size": (640, 640)}, buffer_count=2)
picam2.configure(config)
picam2.start()

# A session loaded from NCNN or TFLite
sess = load_engine("yolo11n_ncnn")
PASS_GPIO = 23
FAIL_GPIO = 24

while True:
    frame = picam2.capture_array()
    detections = sess.inference(frame)
    if evaluate_gate(detections):   # your logic
        set_gpio(PASS_GPIO)
    else:
        set_gpio(FAIL_GPIO)
The code is intentionally short because the complexity lives in evaluate_gate. That function should implement the threshold, area, and temporal voting rules described above.
Measuring Performance: FPS, Latency, and Confidence Budgets
For a real-time quality gate, frame rate and latency are more important than raw mAP. A model that scores higher on mAP but runs at 4 FPS will miss half the parts on a modest 60-part-per-minute line.
As a target, aim for at least 15 FPS at 640×640 resolution. That gives you roughly 4 minutes of continuous inspection with more than 66 milliseconds of compute headroom per frame. At this speed, a Raspberry Pi 5 stays cool enough with just a passive heat sink, provided your ambient factory temperature stays below 40°C.
Measure not just the average inference time but the 95th percentile latency. The occasional slow frame is what causes missed inspections. If you see spikes larger than 150 milliseconds, reduce buffer_count, disable the camera’s auto-exposure on the inspection zone, or lower the inference resolution to 512×512 for the final pass.
Handling Real-World Edge Cases: Lighting, Vibration, and Part Variation
Lighting is the single greatest source of field failures. A fixed overhead LED panel will be enough for glossy parts, but matte or reflective surfaces demand a diffuse light source such as a ring light or a dome illuminator. Install the light before you retrain the model, not after, so the image distribution matches your dataset.
Vibration from the conveyor can cause frame blur even with a global shutter. Mounting the camera on a separate rigid bracket or using a small rubber damper solves most of this. If motion blur persists, add it as a data augmentation during training so the model learns to see defects in slightly soft images.
Finally, expect part-to-part variation. A scratch that appears faint on one batch may look severe on another because of surface finish changes. Keep a small calibration set from each new production batch and run it through the model before the gate goes live. If the confidence distribution drifts by more than ten percent, it is time to collect new training images and fine-tune the model.
Conclusion
Using YOLO on Raspberry Pi for real-time quality gates is no longer a compromise. With a Raspberry Pi 5, a global shutter camera, a quantized nano model, and a clear gate logic design, you can build an offline defect detection system that runs continuously, costs little to maintain, and keeps your production data private. The key is to treat the model as one component of a larger decision loop, measure its real-world latency, and prepare for the lighting and vibration conditions that no synthetic benchmark can capture.