If you’re planning a 10‑day trek through the European Alps, the Mediterranean coast, or the historic cities of Eastern Europe, a portable solar charger for off‑grid Europe backpacking can be a game changer. With the right solar kit, you can keep your phone, GPS, and camera battery levels topped up without relying on cafes or train stations. This step‑by‑step tutorial explains what to buy, how to pack it, and how to use it efficiently on the trail.
Why a Portable Solar Charger Is Essential for Off‑Grid Backpacking
- Reliability: Unlike public charging points, solar power is available anywhere with a clear sky.
- Lightweight: Modern panels and batteries weigh as little as 1 kg, perfect for a 10‑day trip.
- Cost‑Effective: After the initial purchase, you pay nothing more than the sun.
- Environmentally Friendly: No reliance on diesel generators or electricity grids.
Key Features to Look For
When choosing a kit, keep these specifications in mind:
- Panel output: 10–20 W is a sweet spot for a backpacker.
- Battery capacity: 10 kWh or higher gives you several days of power on a single charge.
- Inverter: 12 V to 110 V DC/AC adapters let you charge laptops and other high‑power devices.
- Durability: IP65 rating for water resistance and robust frame for rough handling.
- Portability: Folding or flexible panels that fit in your pack’s side pockets.
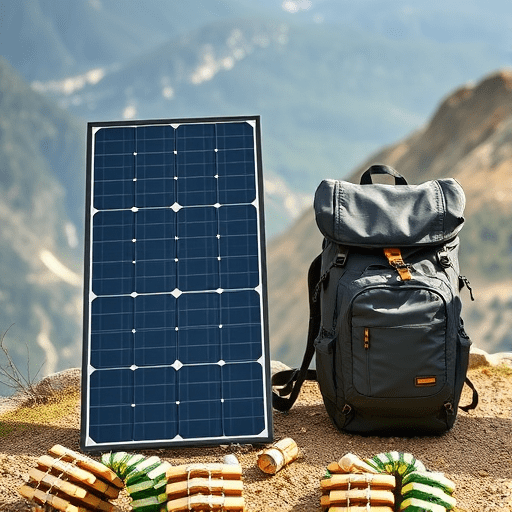
Choosing the Right Solar Kit for Your 10‑Day Trip
Below is a comparison of three popular options for beginners. The best choice depends on budget, pack space, and the types of devices you’ll carry.
1. Goal Zero Nomad 10 W Solar Panel + 10 kWh Power Bank
- Pros: Compact panel, integrated 10 kWh battery, 5‑port USB output.
- Cons: Slightly heavier than folding panels, higher price point.
2. Renogy 18 W Foldable Solar Panel + 12 kWh Battery
- Pros: Extremely lightweight (0.8 kg), foldable design, IP65 rating.
- Cons: Requires an external inverter for AC devices.
3. BigBlue 24 W Solar Panel + 8 kWh Portable Power Station
- Pros: Higher power output, integrated inverter, USB‑C output for laptops.
- Cons: Heavier battery pack (2 kg).
Packing Your Solar Charger for a 10‑Day Journey
The way you pack can affect both the safety and efficiency of your solar setup. Follow these guidelines to keep your gear organized and ready for action.
1. Pack the Panel First
Lay the solar panel flat in a protective sleeve or padded case. If you’re using a foldable panel, fold it along the manufacturer’s recommended lines to avoid stress on the cells.
2. Store the Battery in the Middle of the Pack
Place the battery pack in the core of your backpack, surrounded by soft gear such as clothing or sleeping bag. This keeps the battery cool and reduces vibration damage.
3. Keep Cables Organized
Use a small zip‑lock bag to bundle the solar panel cables, the battery connector, and any USB/AC adapters. Label each cable to avoid confusion in the field.
4. Add a Quick‑Access Pocket
Store a spare solar panel fold or a spare charging cable in a quick‑access front pocket. That way you can replace a worn panel or connect a device on the fly without rummaging through your pack.
Charging Strategy: Maximizing Efficiency on the Trail
It’s tempting to leave your solar panel in the sun all day, but weather and terrain often limit sunlight exposure. Here’s how to get the most out of each charge cycle.
1. Set a Charging Schedule
Plan to charge your panel for at least 4 hours each morning, preferably when the sun is at its highest point. Avoid charging during heavy cloud cover or after rain.
2. Use a Power Bank with Smart Management
Many modern portable power stations include smart charging circuits that automatically switch between solar and battery input. This feature prevents overcharging and extends battery life.
3. Prioritize Your Devices
- Charge the phone first, as it’s essential for navigation and emergencies.
- Next, power the GPS unit or tablet.
- Finally, recharge high‑power devices like laptops or cameras.
4. Off‑Peak Solar Days
If you’re in a shaded valley or mountainous area, you can still harvest solar energy with a portable panel. Position it on a flat surface, use a reflective tarp to direct light, or attach a small solar charger to your tent’s vestibule.
Maintenance and Troubleshooting Tips
Keeping your solar charger in top shape ensures reliable power throughout your 10‑day trek.
1. Clean the Panels Regularly
Dust, bird droppings, and leaf litter can block sunlight. Use a microfiber cloth and mild water to wipe the panel surfaces. Avoid abrasive materials that can scratch the cell coating.
2. Inspect for Damage
After each day, check the panel for cracks, loose connectors, or bent frames. A damaged panel can lose efficiency or pose a safety risk.
3. Test the Battery Capacity
Once a month, run a full discharge and recharge cycle to confirm that the battery’s stored capacity remains within spec. Many portable power stations provide a diagnostic screen for this purpose.
4. Store Properly When Not in Use
If you’re staying in a hostel or hotel, keep the panel in a dry place and the battery in a cool, dry location. Avoid extreme temperatures which can degrade the battery chemistry.
Safety Considerations for Off‑Grid Solar Power
While solar panels are generally safe, some precautions can help prevent accidents or equipment damage.
1. Avoid Direct Contact with Live Wires
Even though solar panels produce low voltage, stray currents can still pose a shock hazard. Keep cables secured and away from water sources.
2. Protect Against Lightning
During a storm, disconnect the solar panel from the battery. Lightning can surge through the system and damage electronics.
3. Secure the Panel When Camping
Tie the panel to a fixed point in the tent or use a solar panel mount. This prevents accidental dislodgement from wind or wildlife.
Real‑World Use Case: A 10‑Day Route Through the Dolomites
Consider the “High Route” trail in the Italian Dolomites, a 10‑day loop that takes you from the town of Cortina d’Ampezzo to the valley of Val Gardena. Here’s how a portable solar charger made the trip smoother.
- Day 1–3: The panel was positioned on a flat terrace near the base of the Marmolada glacier, providing 4 hours of charge each morning.
- Day 4–7: On ridge days, the panel was strapped to the side of the tent, using the vestibule to shield it from rain while still catching the sun.
- Day 8–10: In the final valley days, the solar charger was parked in the car, ensuring the power station was full before departure.
With this setup, the traveler kept their devices fully charged, avoided reliance on mountain huts’ limited charging stations, and enjoyed uninterrupted navigation and photography.
Future Trends: 2026 Solar Backpacking Gear
The next generation of solar backpacks is poised to integrate solar cells directly into the pack’s exterior. Brands are testing ultra‑thin, flexible cells that double as protective covers. In 2026, these packs could weigh as little as 300 g of solar material while providing 5–10 W of power—enough to keep a phone alive on a short hike.
Additionally, the rise of wireless charging means that future power stations might offer Qi or proprietary charging pads, allowing you to top up devices without cables. This could further reduce pack weight and simplify usage.
Conclusion
By carefully selecting a lightweight solar panel, pairing it with a high‑capacity battery, and following smart packing and charging practices, you can confidently embark on a 10‑day off‑grid Europe backpacking adventure. A portable solar charger not only extends your device autonomy but also brings peace of mind, letting you focus on the journey rather than the next charging spot.