If you’ve been searching for a realistic way to write failing tests for open source to build your dev portfolio, you already know that most “beginner contribution” advice starts and ends with fixing typos. But in the current open-source landscape, maintainers are drowning in unaddressed test failures — and those failures are a goldmine for developers who want to prove their debugging skills. Instead of hunting for a “good first issue” that everyone else is also eyeing, you can become the person who notices what’s broken, writes a test that demonstrates the break, and opens a PR that starts a meaningful conversation. That is not just portfolio padding; that is community value.
This tutorial walks you through a fresh angle: turning noisy, ignored, or simply unexplained test failures into visible, well-documented pull requests. You’ll learn where to find these failures, how to write a failing test that shows off your diagnostic thinking, and how to turn that small contribution into a compelling story about your skills.
Why Test Failures Are the Perfect Entry Point
Open-source maintainers face a constant flood of issues, feature requests, and code reviews. The last thing they want to do is spend hours reproducing a bug that someone already reported. Yet in almost every popular repository, you’ll find CI logs with failing tests that nobody has claimed. These failures are often marked as “flaky,” “low priority,” or “needs investigation.” For a contributor, this is an open door.
Unaddressed test failures are perfect for your portfolio because they are concrete. A passing test proves something works; a failing test reveals a gap between expectations and reality. When you write a failing test that exposes a real bug, you’re showing that you can analyze a codebase, understand its intended behavior, and communicate that understanding with precision. You’re not just contributing code — you’re contributing clarity.
Maintainers Value Debuggers as Much as Feature Builders
Most open-source contributors want to add features or refactor code. Far fewer want to dig into a failing test suite, read through stack traces, and isolate edge cases. That means your competition is small. Maintainers often have a backlog of failing tests that they know about but simply don’t have time to fix. When you offer a well-written failing test as a starting point, you’re helping them triage a problem they might otherwise ignore.
Finding Your First Failing Test in an Open Source Project
You don’t need to stumble upon a failure by chance. You can actively seek out repositories with visible signs of trouble. Start with projects you already use or find interesting. Then, look at their CI status badges, recent commits, and open issue trackers. If a repository has a red CI badge on the README, that’s a strong signal.
- Search for repositories with recent commits and open issues referencing “test failure” or “flaky test.”
- Use GitHub’s issue search with filters like
state:open label:bugand terms like “unhandled rejection,” “timeout,” or “assertion failed.” - Check the “Actions” or CI tab for recently failed runs, especially on the default branch.
- Look for test files that are skipped, commented out, or decorated with
@pytest.mark.skipor@Ignore— those are often leftovers from known issues.
Once you find a candidate failure, the next step is to understand it. Run the test locally, if possible. Reproduce the failure. Take notes on the exact input, output, and stack trace. This is the groundwork that makes your eventual PR visible and respected.
How to Identify an Unaddressed Failure vs. a Known Issue
An unaddressed test failure is not the same as a known bug with an assigned owner. Before you invest time, verify that the failure is not already being discussed. Search the issue tracker for the exact assertion message or test name. If you find an open issue that matches, check the conversation. Are maintainers asking for a repro? Has anyone submitted a PR? If no one is actively working on it, you can safely step in. Even better: if the issue is older than a few months and still open, your fresh perspective is likely to be welcome.
Crafting a Failing Test That Shows Skill
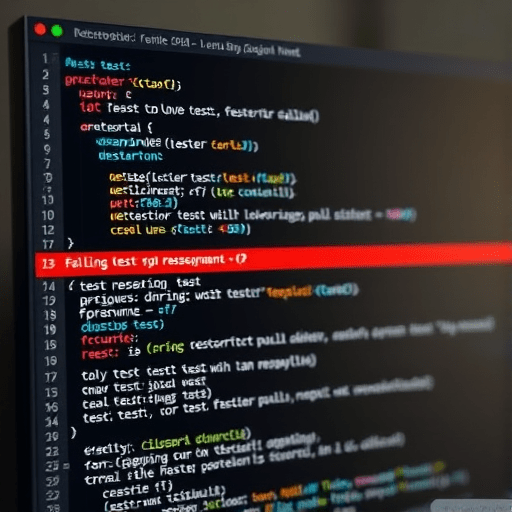
Writing a failing test for an open-source project is not just about making a test that goes red. It’s about writing a test that communicates why it fails and what the expected behavior should be. This is where your debugging skill shines. A generic test that says “this function is wrong” helps no one. A focused test that isolates a specific input, describes the expected result, and points to the likely root cause is worth its weight in gold.
The Anatomy of a Useful Failing Test
- A descriptive test name that explains the expected behavior, e.g.,
test_should_handle_empty_string_without_raising. - A minimal setup that uses only the necessary fixtures or mocked dependencies.
- A clear assertion that matches the documented behavior or the maintainer’s stated intent.
- A link to the issue or CI failure in a comment, so future readers know why this test exists.
Keep the test small and readable. If the existing codebase uses a particular testing style, follow it. If the project uses pytest or Jest, write the test the way the project expects. This proves you can integrate with existing conventions, not just solve a puzzle in isolation.
Avoid Trivial or Artificial Test Failures
Your goal is to expose a real problem, not to manufacture one. Don’t write a test that checks a meaningless implementation detail or one that will only fail because you changed a constant. Maintainers will quickly spot a test written solely for your benefit. Instead, tie your failing test to a real edge case, a documented promise, or a regression that you discovered from the project’s own commit history.
From Failing Test to Visible PR: A Conversation Starter
Opening a PR with a failing test may feel unusual. Many contributors fear that maintainers will reject it because “the test is failing.” In practice, a PR that contains a failing test — with a clear explanation and a suggested fix — is a conversation starter. It shows that you’ve done the diagnostic work and you’re inviting collaboration, not demanding attention.
When you open the PR, include a detailed description. Start with what the test does, then show the failure output, and finally explain why you believe the expected behavior is correct. Reference the issue number if one exists. If there is no issue, open one first and link the PR to it. This gives maintainers context and makes the PR easier to review.
How to Write a PR Description That Gets Noticed
- Summarize the failing behavior in one sentence.
- Include the full stack trace or assertion message from your local run.
- Explain the root cause hypothesis, even if you’re not 100% sure.
- Ask a specific question: “Is this expected behavior, or should the function handle null input?”
This approach turns your PR from “here is a failure” into “here is an observation, an experiment, and an invitation to collaborate.” Maintainers are far more likely to engage with that kind of contribution.
Making Your PR Impossible to Ignore
The key to visibility is being useful. A PR with a failing test and a proposed fix is immediately actionable. If you can also suggest where the bug might be located in the source code, you’ve saved the maintainer time. If you can’t suggest a fix, that’s okay — your test is still a valuable artifact. The combination of a clear description, a minimal failing test, and a respectful tone is surprisingly rare in open source.
Turning Your Failing Test PRs Into Portfolio Proof
The purpose of this exercise is not just to improve the open-source project; it’s to build a portfolio that demonstrates your debugging skills. A list of merged PRs is nice, but a set of well-documented troubleshooting stories is far more compelling. For every failing test PR you open, create a short case study.
Your case study should answer three questions: What did the codebase look like? What failure did you find? How did you investigate and communicate it? You can host these case studies on a personal blog, a GitHub repository, or any portfolio site. Link to the actual PR and the issue. Include a snippet of the failing test you wrote. Explain what you learned about the project’s architecture, testing patterns, or CI setup. This turns a small contribution into a rich piece of evidence for future employers.
What to Highlight on Your Resume and LinkedIn
Don’t just list “Contributor to Project X.” Use bullet points that describe your impact:
- “Wrote failing tests to expose an unhandled edge case in a popular open-source library; the resulting PR led to a maintainer-approved fix.”
- “Investigated a recurring CI failure and isolated the root cause to a race condition in the test setup, saving maintainers hours of debugging time.”
- “Turned an unaddressed test failure into a documented issue and a minimal reproduction, improving the project’s onboarding clarity for future contributors.”
These descriptions are powerful because they focus on outcomes, not just effort. They show that you can take an ambiguous problem, create structure around it, and deliver something useful to a distributed team of strangers.
Conclusion
Unaddressed test failures are not a sign of a bad project; they are an opportunity for a sharp-eyed contributor. By learning to write failing tests for open source to build your dev portfolio, you position yourself as someone who can analyze, debug, and communicate in a way that maintainers genuinely need. The next time you see a red CI badge or a skipped test, don’t scroll past it. Turn it into a visible PR, a thoughtful case study, and a portfolio that proves exactly how you think.