# How to Recover from Blisters Mid-Trail Without Ending Your Hike
You feel it first as a faint warmth, then a subtle throb, and finally a sharp burn with every step. That’s a hotspot forming inside your sock, and if you’ve ever had a full-blown blister derail a backpacking trip, you know the dread. But here’s the good news: learning how to recover from blisters mid-trail without ending your hike is entirely possible—provided you act fast and carry the right tape. With a few ounces of gear and a simple routine, you can turn a potential trip-ender into a minor roadside repair and keep putting miles behind you.
## Why Blisters End More Hikes Than Any Gear Failure
Blisters are the single most common reason hikers cut trips short, outranking broken straps, wet sleeping bags, and even sprained ankles. The mechanism is simple: friction plus moisture plus heat creates shear forces between your skin and sock. As the layers of skin separate, fluid fills the void to protect the raw tissue underneath. Once that blister pops, you’re left with an open wound that can become infected deep on the trail.
The good news is that blisters follow a predictable progression: hotspot, red zone, fluid-filled blister, open blister. Each stage gives you a window to act. Most hikers ignore the first two stages and pay for it later. The most effective trail treatment is not a fancy cream or a magic patch—it’s friction management using tape that stays put when you sweat.
## Catch Hotspots Early: The 60-Second Check That Saves Miles
Stop every 30 to 45 minutes while hiking and perform a quick foot check. You don’t need to take your boots off every time; simply press along your heels, the balls of your feet, and the sides of your toes through your socks. A spot that feels warmer than surrounding areas is a hotspot in the making. If you feel a tender ridge or a slight stickiness when you slide your sock over skin, that’s a warning sign.
When you do stop for a longer break, take off your boots and socks. Look for any red area that persists after a minute. If you see redness, you are at the pre-blister stage. This is the absolute best moment to apply tape because the skin is still intact and you can prevent the shear forces from ever building a pocket of fluid. Waiting until you feel a blister “pop” under your sock means you’ve already missed the easy window.
## Duct Tape vs. Leukotape: What to Use and When
The classic trail debate is duct tape versus leukotape, and the answer depends on your skin, the terrain, and how much weight you’re willing to carry. Duct tape is everywhere, cheap, and works in a pinch. Its cloth backing is breathable enough for short term use, but it tends to peel off when soaked with sweat, especially on hot days or at the heel where flexing is constant.
Leukotape, however, is the gold standard for mid-trail blister recovery. It’s a zinc-oxide based sports tape that sticks aggressively to skin and retains adhesion even through stream crossings and hours of perspiration. A three-quarter-inch roll weighs less than an ounce and can treat dozens of hotspots. The adhesive is strong enough that you’ll want to tear it with scissors or a knife—pulling a thin strip off the roll with your teeth rarely produces the clean square edge you need.
For sheer versatility, some hikers carry both: duct tape for gear repairs and camp first aid, leukotape for skin. But if you can only choose one for blister management, choose leukotape. The difference is dramatic when you are miles from the trailhead and your heel is screaming.
## Step-by-Step: How to Treat a Hotspot Mid-Trail
When you catch a hotspot early, follow this practice that is reliable in nearly every condition:
**Prepare the skin.** Stop and dry the area completely. Wipe away any dirt, grit, or sweat using a bandana or the driest part of your shirt. Do not apply tape to wet skin—it will slide and create worse friction. If you have an alcohol wipe or hand sanitizer, use it to remove oils and let it dry for a few seconds. This helps the adhesive bond to the skin.
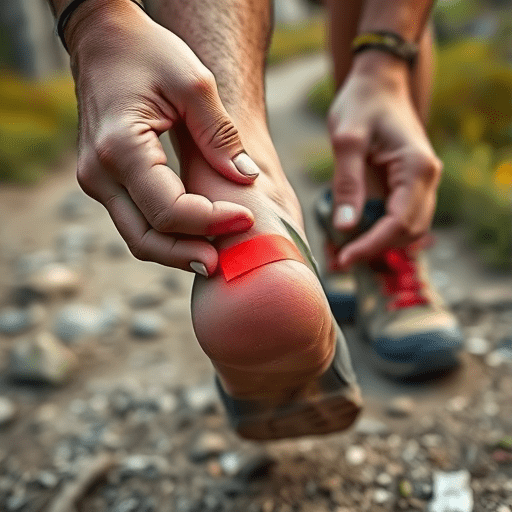
**Create a smooth base.** For very red but unblistered skin, apply a thin strip of leukotape directly over the entire red area. Make sure the edges are rounded—cut small curves at the corners so the tape doesn’t peel up when your foot flexes. Sharp corners are the enemy; they catch on socks and become new friction points.
**Reduce shear further.** Here is a trick many long-distance hikers use: place a small strip of tape perpendicular to the long axis of your foot—like a “bridge” around the heel or across the ball of your foot. This prevents the skin from folding and rubbing against the inside of your boot. It may feel slightly snug at first, but that tightness disappears once your foot warms up.
**Add a sock layer.** Never leave taped skin exposed; always pull a clean sock over it. A thin liner sock underneath a thicker wool sock provides two layers that slide against each other instead of against your skin. This double-layer system is the most effective way to prevent blisters from forming again at the same spot.
## What If It Already Popped? Managing an Open Blister on Trail
If you missed the hotspot window and the blister is already open, your approach changes. First, resist the urge to peel off the loose skin. Leave the roof of the blister intact—it is a natural sterile dressing. Clean the area with clean water or an antiseptic wipe if you have one. Pat it dry carefully.
Apply a thin layer of antibiotic ointment if you carry it, though it is not strictly required. Then cover the entire open area with a sterile non-stick pad, such as a small piece of moleskin with the center cut out (forming a donut shape around the blister). Secure the donut with leukotape around the perimeter, making sure no tape touches the open wound directly.
If the blister is very large and fluid-filled but not yet popped, do not pop it deliberately on the trail. The fluid is sterile and protects the damaged skin underneath. But if it has popped on its own, keep it clean and dry. Change the dressing at every rest stop. If the surrounding skin turns red, hot, or the fluid smells bad, those are signs of infection, and you should head to the nearest exit point sooner rather than later.
## Advanced Field Techniques: When Tapes Don’t Stick
Sweaty feet, dusty trails, and wet conditions can defeat even the stickiest tape. One effective field technique is “sweat-proof layering”: apply a small amount of tincture of benzoin to the skin around the hotspot, let it become tacky, then apply the tape. Benzoin is a resin that dramatically increases adhesion, and it comes in small single-use wipes that weigh nothing.
Another trick is to use a product called Hikers Wool. This soft, lanolin-infused wool is placed directly over the red area before taping or even inside your sock. It absorbs friction and moisture and can be a lifesaver when you have multiple hotspots and limited tape. Many hikers keep a small pouch in their hip belt for quick access.
If you are hiking in hot, dry conditions, dust can get under the tape edges and break the seal. Re-tape every morning before you start hiking rather than waiting until midday when sweat has already compromised the adhesion. Morning application on clean, dry foot skin is the single best way to ensure your tape lasts the full day.
## When to Call It: Signs You Should Turn Back
Recovering from blisters mid-trail does not mean pushing through every situation. You should seriously consider turning back or arranging an early exit if you have an open blister that shows spreading redness, warmth, or throbbing pain. These are signs of cellulitis, a bacterial infection that can escalate quickly in the backcountry. Likewise, if you have a medical condition that impairs circulation—such as diabetes—treat even a small hotspot with extreme caution and do not hesitate to shorten your trip.
Additionally, if a blister is on a weight-bearing spot like the center of your heel and you still have more than 10 miles to cover over rough terrain, tape can only do so much. Use your judgment. A disappointed day-shortened hike is better than a multiday infection that requires evacuation. The smartest hikers know when a blister is a nuisance—and when it is a signal.
## The Takeaway for Your Next Hike
Blister management is a skill, not a tragedy. Carry a small roll of leukotape, a bandana, and maybe a few benzoin wipes, and check your feet early and often. The difference between a hike that ends at the trailhead and a hike that ends at the summit is often just a few inches of well-applied tape. Next time that familiar heat builds inside your boot, stop, dry, tape, and keep moving. Your feet—and your itinerary—will thank you.