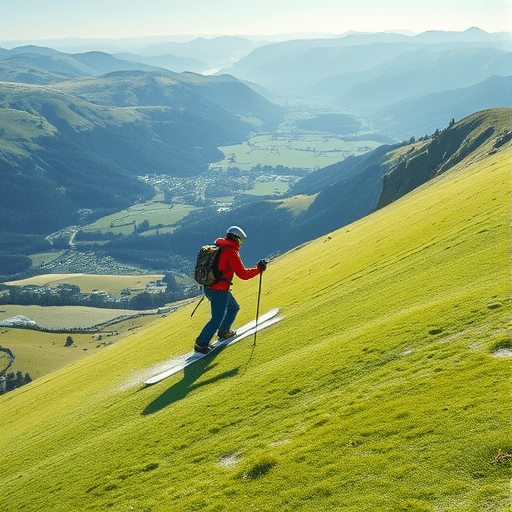
If you’re planning a solo ascent in Patagonia this year, the 2024 risk mitigation checklist is essential. This guide walks you through step‑by‑step safety protocols, gear essentials, route planning strategies, and insider tips from local guides to help you navigate the region’s unpredictable weather, challenging terrain, and logistical nuances with confidence.
1. Preparation Before You Pack
1.1 Define Your Objectives
Start by outlining the specific climbs you want to tackle. Are you aiming for the Torres del Paine “W” Circuit, the Cerro Castillo’s north face, or an isolated alpine ridge in Los Glaciares National Park? Knowing your targets early allows you to align your training, budget, and equipment with the demands of each route.
1.2 Build Physical and Mental Resilience
Solo Patagonia demands both physical endurance and mental fortitude. Incorporate long hikes with weighted packs, interval training for VO₂ max, and mental rehearsal drills that simulate isolation and decision fatigue. Mindfulness practices help you remain calm when unexpected weather hits.
1.3 Secure Permits and Logistics
Patagonia’s most iconic peaks require permits that can be obtained only through official tourism boards or park authorities. Apply at least two months ahead, as the 2024 season’s application windows open in late November. Plan transportation to the nearest access point (often a remote town like El Calafate or Puerto Natales) and arrange accommodation in hostels or refugios that can serve as emergency shelters.
2. Weather & Timing: The Biggest Variable
2.1 Monitor Climate Patterns
Patagonian weather is notoriously volatile, with wind gusts exceeding 100 km/h and sudden temperature swings. Subscribe to local meteorological feeds from the Argentine Meteorological Service and the Chilean Dirección Meteorológica. Check the El Niño/La Niña cycle impact for the year; 2024 has an active El Niño phase, increasing rainfall and cloud cover in the Southern Patagonian Ice Field.
2.2 Choose the Optimal Window
Peak climbing season in Patagonia runs from mid‑December to early February, but this also coincides with the warmest temperatures and the most storms. For solo climbers who value stability over peak sunshine, the shoulder months of March and April offer clearer skies and less wind, though temperatures drop below freezing earlier.
2.3 Pack Weather‑Proof Gear
Layering is key. Use high‑performance base layers (Merino or synthetic), a wind‑proof shell, and a waterproof, breathable outer shell. Never underestimate the value of a windbreak jacket; even on mild days, wind can reduce your body temperature by up to 10 °C.
3. Route Planning & Navigation
3.1 Study Topographic Maps and Route Guides
Download recent topographic maps from Peakbagger and SummitPost, and review local guidebooks such as “Patagonia: The Complete Guide.” Pay close attention to key features: crevasse fields, ridge traverses, and potential avalanche zones. For 2024, the new GPS mapping of the Cordillera de los Andes now includes detailed contour lines up to 5 m elevation accuracy.
3.2 Map the Backup Plan
Solo climbers should map at least two alternative routes per objective. Identify safe zones—rock outcrops, glacial ledges, or bivouac spots—where you can retreat if weather worsens. Label these on a paper map; digital devices can fail in extreme cold or low battery.
3.3 Practice with a “Mental GPS”
Spend a training day in a remote area and navigate entirely with a handheld GPS, a topo map, and a compass. The mental map you build will be invaluable when you face navigation challenges at altitude.
4. Gear Essentials for Solo Patagonia Climbers
4.1 Core Equipment
- Alpine pack (60–70 L) with a 60‑L capacity for gear and a 10‑L daypack for essentials.
- Alpine climbing harness (full‑body) with a 50 mm belay loop.
- Rope: Dynamic 70 m 9 mm for lead climbing, plus a static 60 m for anchoring.
- Carabiners (lock‑eject and fixed) – at least 12.
- Protection gear: cams 0–5, nuts 0–8, and a set of hexes.
- Helmet, climbing shoes, chalk bag.
4.2 Survival & Safety Kit
- Satellite phone or personal locator beacon (PLB) – the Garmin InReach is popular.
- Multi‑tool, knife, and a fire starter kit.
- High‑energy food (freeze‑dry meals, protein bars) – at least 3 days of calories.
- Thermal blankets and emergency bivy sack.
- First‑aid kit (include blister treatment, antibiotic ointment, and a splint).
4.3 Weather‑Adaptation Gear
- Gaiters to protect against wet snow and wind.
- High‑visibility climbing vest with reflective strips.
- Layered windproof windbreak jacket and a down or synthetic parka.
- Glove set: thin gloves for dexterity and insulated gloves for warmth.
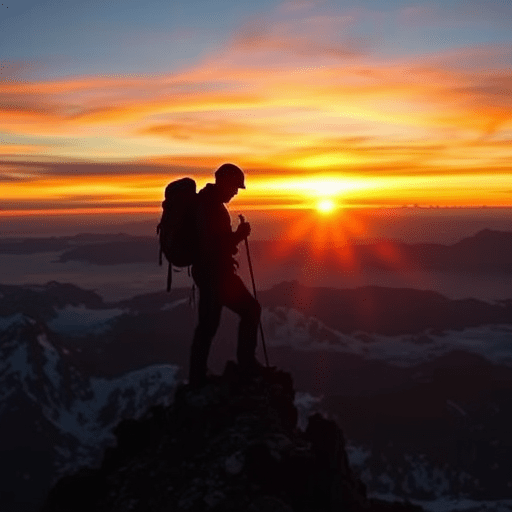
5. Safety Protocols for Solo Ascents
5.1 Establish a Check‑In Routine
Before you depart, schedule a check‑in time with a trusted friend or family member. Use a satellite phone to confirm your arrival and expected return. If the check‑in fails, notify the local search and rescue authority immediately.
5.2 Implement a “One‑Minute Rule”
When you are on the summit or a precarious ridge, spend no more than one minute in that spot. This reduces exposure to sudden weather changes or falling debris. When the one‑minute timer rings, descend or seek shelter immediately.
5.3 Use the “Signal and Wait” Method
Should you encounter a rockfall, crevasse, or other hazard, signal with a whistle or a pre‑arranged noise sequence, then retreat to a safe location. Avoid the temptation to scramble back; solo decisions are often made under duress.
5.4 Anchor Planning
Place a minimum of two secure anchors on each ridge traverse. Use a combination of natural features (horns, ledges) and gear (cams, nuts) to distribute load. Always test each anchor before committing to a lead.
5.5 Managing the “Wind‑Blind” Situation
When wind gusts reach 90 km/h, visibility can drop to less than 10 m. In such conditions, rely on a rope, maintain a rope tension, and stay close to the ridge to minimize the risk of being blown off.
6. Local Guide Tips and Cultural Considerations
6.1 Engage with Patagonian Guides
Even for a solo climb, a local guide’s knowledge of micro‑climates and crevasse patterns can be priceless. In 2024, guide certifications have incorporated advanced avalanche education, and many guides now carry the “Patagonian Glacier Certified” badge.
6.2 Respect the “Ferro‑Pueblo” Heritage
Patagonia’s rural communities are steeped in the legacy of the “ferro‑pueblo” (iron‑town) settlers. When staying in hostels or refugios, observe local customs: ask permission before photographing, always offer a small tip (10–15 %) and be mindful of the environment by packing out all waste.
6.3 Language and Communication
Spanish is the primary language; however, many local guides in remote areas also speak English. When arranging logistics, provide clear written itineraries and use a translation app if needed. Avoid using only text messages; a voice call is more reliable in low‑coverage zones.
6.4 Weather‑Response Protocols from Local Guides
- Guides recommend a “two‑hour buffer” before starting a summit push, allowing for wind and visibility checks.
- In case of a sudden storm, the guide will advise a quick descent to a predefined safe camp.
- Guides maintain a weather station near popular routes; you can access real‑time data via a QR code on the trail sign.
7. Emergency Plan & Communication
7.1 Pre‑Trip Emergency Contacts
Share your itinerary with at least three people and provide the contact details of the nearest search and rescue office (e.g., Patagonia Mountain Rescue – Puerto Natales). Keep a printed copy of emergency contacts in your pack.
7.2 Satellite Phone Protocol
Use the satellite phone only for emergency messages. Draft a concise “Emergency Message” template: “SOS – Solo climber at latitude X, longitude Y, altitude Z, needing rescue. Current condition: stable.”
7.3 First Aid & Self‑Rescue Scenarios
Practice applying a splint, treating blisters, and performing a basic CPR. If you suffer a fall and have a broken limb, use your backpack as a sling, secure it to a nearby rock, and signal for help.
8. Post‑Trip Review and Debrief
8.1 Log Your Experience
Maintain a climbing journal: note route difficulties, weather observations, and any safety incidents. Use this log to refine your future risk mitigation strategies.
8.2 Share Feedback with Local Communities
Provide constructive feedback to guides and park authorities about trail conditions or hazards you encountered. This helps improve safety for the next group of climbers.
8.3 Physical Recovery
Dedicate at least a week to active recovery—light walking, gentle stretching, and adequate hydration. Reassess your gear after the climb; replace any worn-out ropes, cams, or protective gear.
Conclusion
Solo climbing in Patagonia in 2024 demands meticulous planning, a comprehensive risk mitigation checklist, and a respectful attitude toward the environment and local communities. By preparing with the right gear, understanding weather patterns, engaging local knowledge, and implementing strict safety protocols, you can reduce the inherent risks and focus on the exhilaration of conquering Patagonia’s rugged peaks.