1. Introduction
Welcome to your journey toward crafting a modern, personal portfolio website. Whether you’re a web developer, a designer, or a developer with some basic coding skills, this guide will walk you through creating a sleek, interactive site that showcases your work, highlights your skills, and projects. We’ll explore the core building blocks of HTML, CSS, and the power of vanilla JavaScript, and put your portfolio in the spotlight.
By the end of this beginner guide, you’ll have a solid, functional personal portfolio website that can be used to showcase your work and brand. It’s an opportunity to create a platform that’s both modern and truly simple to navigate for the general tech-aware audience.
2. Planning Your Portfolio
Define Your Purpose
What do you want your website to accomplish? Do you want to showcase your photography, illustrate your coding projects, or highlight your design work? Identify the core goal and determine your website’s audience and who you want to target. This will influence how you build the site’s structure, content, and overall design.
Choose Your Design Style
For a modern personal portfolio website, you’ll likely want a clean, minimal aesthetic, with a strong use of typography and a single, simple, color scheme that enhances the look of your portfolio. Choose a short, cohesive design style that feels modern, yet approachable and easy to read for a general, tech-aware audience. Consider using a monospace or sans-serif font for a modern vibe.
3. Setting Up Your Project
Folder Structure
Create a new folder called “modern-portfolio-website”. Inside, add a index.html file and a style.css file. Organize your folder structure to separate your HTML, CSS, and images for a clean and easy to maintain project.
File Structure
Your “modern-portfolio-website” will contain:
- index.html (main file)
- style.css (CSS file)
- assets/ folder for images and media files
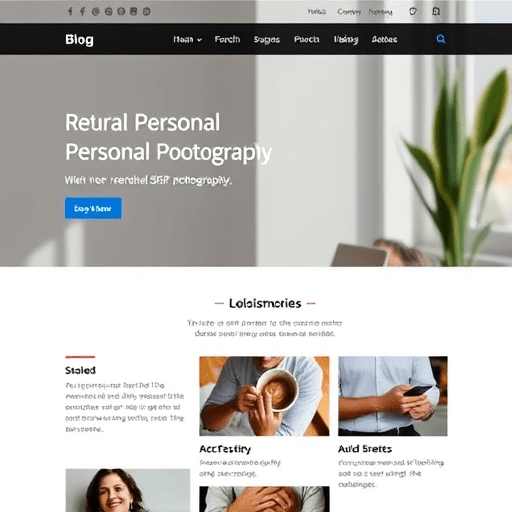
4. Building the Header and Hero Section
Header Section
In your index.html file, create a header element that contains your name or logo. Add a nav element to create your navigation. Use a h1 element to display your name or brand. Keep the header and header in a modern, clean and easy to read design.
Hero Section
Add a section with class “hero” to create a hero section that includes a h1 element that introduces your work or p element that shows your tagline or description. Use a background image or color to create a modern, well‑structured hero section that’s easy to read.
5. Adding About and Projects
About
In your hero section, add a p element that outlines your background and skills or experience. Keep the about content concise, highlight your background or experience and key areas.
Projects Section
In the section for your projects, create a div with class project to showcase your projects. In each, create a title that shows your project name, a p element that displays your project description or p element. Use a img element that shows the project’s image.
Contact Section
Create a div or div contact in your footer to create a contact section that shows your contact information or links. Use a ul element with li to list contact or contact items or links.
6. Styling and Design
CSS for the Hero Section
In your style.css file, create a hero CSS that shows a background or color that matches the color scheme and adds a h1 CSS to display the hero title. Keep the hero CSS short and easy to read.
Enhancing the Design
Add a font that shows a sans-serif or monospace font that shows a modern or design that’s both easy to read and the best design. Use a single color that’s easy to see, and add a modern style for the hero that is simple
Use vanilla JavaScript to add interactive elements like a scrolling or hero text. You can also create a simple JavaScript that shows a dynamic effect on your hero or contact or contact section.
Add a JavaScript script to create a simple interactive that shows JavaScript for the modern or simple design. Create a simple JavaScript that adds a dynamic effect on the hero or contact or contact section for modern design.
To deploy your modern personal portfolio website, create a GitHub Repository and push your code to your repository. After that, add GitHub Pages or a hosting that shows the modern design for your website to create the final and the final design for your portfolio that’s modern and simple.
Test your modern personal portfolio website by visiting the deployed URL and ensuring that all pages are functioning properly and that the design is modern. If you’re using a GitHub Pages or hosting that shows the design and color that is modern. If any errors are found, you can fix them or add deploy your updated website and make the changes before deploying.
Verify your website is modern, your pages are loading correctly, and that the style and JavaScript functions are working properly. Keep your style or JavaScript functions working, and your website is modern and simple.
Create a GitHub Repository that shows the repository and add a GitHub and Page to the website to create the final, fully functional, and fully functional modern personal personal portfolio website. It’s now simple and a simple personal portfolio that is simple and simple.
Your personal portfolio website is now simple and fully functional, ready to show your modern work. This will allow you to share the website with a modern audience and simple and simple simple.
By the end of this beginner tutorial, you will have built a modern, simple, and fully functional personal portfolio website that’s both modern and truly impressive. Your modern, personal portfolio website showcases your work, highlights your achievements and provides a platform for your design and your portfolio and you’re ready to publish your portfolio.
JavaScript for Interactivity
7. Finalizing Your Portfolio
Adding Interactivity
Deploying Your Website
8. Testing and Deployment
Final Checks
Deploy
Publish
Conclusion