In 2026, the appetite for retro aesthetics remains stronger than ever, yet developers face the technical challenge of showcasing those beloved pixel masterpieces on crisp, high‑definition displays. The long‑tail keyword “remaster classic pixel art for modern platforms without losing charm” captures exactly this dilemma: how to translate 8‑bit sprites into a 4K console or a retina‑enabled mobile device without blurring that nostalgic crispness. This guide walks through a contemporary workflow that blends TexturePacker’s powerful sprite packing with Unity’s pixel‑perfect rendering pipeline, ensuring every icon, tile, and animation stays true to its original grain while scaling beautifully across devices.
Why Pixel Art Still Needs a Modern Remastering Pipeline
Pixel art was born in an era of limited resolution, constrained color palettes, and display hardware that rendered a single pixel as a perfect square. Today’s screens boast millions of pixels and sub‑pixel rendering, which can turn a hard‑edge sprite into a fuzzy blur if handled incorrectly. Two core challenges arise:
- Non‑integer scaling: Modern devices often use fractional scaling factors (e.g., 2.5×, 3.33×), which can cause pixels to be rendered as incomplete squares.
- Texture filtering: Linear filtering, default on many graphics APIs, interpolates between neighboring texels, softening the characteristic blockiness of pixel art.
Addressing these issues demands a workflow that respects the discrete nature of pixels while still allowing dynamic resolution adaptation.
Step 1: Organize Your Art Assets for the Future
Before feeding any artwork into TexturePacker or Unity, keep a consistent naming convention and folder structure. For a 2026 remaster, consider:
assets/tiles/grass.png,assets/tiles/stone.pngassets/sprites/player/idle.png,assets/sprites/player/run/frame_1.pngassets/animations/particle/fire_01.png,assets/animations/particle/fire_02.png
Batch sprites that share the same palette into a single sprite sheet; this reduces the overall texture count and makes it easier to apply consistent color palettes during packing.
Step 2: Leverage TexturePacker 2026 – The Pixel‑Perfect Packager
TexturePacker’s 2026 update introduces a “Pixel‑Perfect Mode” that automatically removes superfluous padding, aligns sprites to integer pixel boundaries, and preserves exact texel coordinates. Here’s how to configure it for a high‑definition remaster:
- Enable “Pixel‑Perfect Mode”: In the settings, check the box to enforce integer packing. This ensures that each sprite’s texel grid aligns with the final rendered pixels.
- Set “Padding” to zero: Padding is useful for certain algorithms (e.g., normal mapping) but undesirable for pure pixel art, as it introduces unwanted transparency around sprites.
- Choose “Trim” options wisely: Auto‑trim removes transparent borders, but be careful with sprites that intentionally include padding for animation (e.g., a sword swing that moves slightly beyond its bounding box). For those, disable trimming or use manual trim boundaries.
- Export to “Unity 2D” format: This outputs a
plistfile that Unity can read natively, preserving frame names and animation sequences.
TexturePacker’s preview window now shows how each sprite will be laid out on the atlas, allowing you to spot misaligned pixels before committing.
Handling Color Palettes and Dithering in 2026
With the advent of 10‑bit color displays, subtle dithering can improve the perception of gradients in pixel art. TexturePacker now supports dithering modes that mimic the classic “ordered dithering” technique used in NES and SNES titles. Turn on “Ordered Dithering” for assets that need smoother color transitions, such as water or foliage, while leaving sharp, low‑color assets untouched to preserve their crisp edges.
Step 3: Importing Into Unity – The Pixel‑Perfect Camera and SpriteRenderer
Once your atlases are ready, the next phase is to ensure Unity renders them without aliasing. The Pixel Perfect Camera component is the cornerstone of this process. Here’s a streamlined workflow:
- Create a new 2D project. Enable “Use HDRP” only if you need advanced lighting; for pure pixel art, the Lightweight or Universal Render Pipeline (URP) is sufficient.
- Add the Pixel Perfect Camera component: Drag it onto your main camera. In the inspector, set:
Assets Pixels Per Unitto match the pixel density of your original art (commonly 16 or 32).Reference Resolutionto the design resolution you’re targeting (e.g., 1920×1080).Upscale Render Textureto “None” if you’re using a 2:1 or 4:1 integer scaling factor.
- Use the
SpriteRenderercomponent on each game object. Ensure thatSprite Modeis set to “Single” or “Multiple” as appropriate for animated frames. - Set the texture import settings: In Unity’s Inspector, choose
Filter Mode: Point (no filter)andCompression: Nonefor pixel art textures. EnableGenerate Mip Mapsonly if you plan to use them for parallax; otherwise, disable them to avoid bleeding.
Internal Link Placeholder
Step 4: Dynamic Scaling Across Platforms
Modern devices vary widely in pixel density—from 100 ppi on some older phones to 400 ppi on flagship displays. A dynamic scaling strategy keeps your art crisp on all screens while preserving the retro feel. In Unity, you can achieve this with a combination of the following:
- Aspect Ratio Management: Use the
Canvas Scalerset to “Scale With Screen Size” for UI, and keep the main camera’sOrthographic Sizeconstant for gameplay. - Runtime Resolution Switches: At startup, detect the screen DPI and switch to the nearest integer scaling factor. For example, a 2.4× DPI ratio would round to 2× to maintain blockiness.
- Sprite Packer Overrides: In Unity 2026, the
Sprite Packercan be overridden per platform. Create separate atlases for 2×, 3×, and 4× resolutions to optimize memory usage and avoid on‑the‑fly scaling artifacts.
Testing on each target platform (iOS, Android, Windows, PS5, Xbox Series X) ensures consistent visual fidelity. The Unity Remote 5 tool, coupled with Quality Settings presets, allows rapid iteration without deploying to each device.
Step 5: Custom Shaders for 2026 – The Pixel Art Shader Reloaded
While Unity’s built‑in shaders can handle most use cases, the 2026 update introduces a lightweight Pixel Art Shader that automatically applies edge‑preserving filters and color remapping. Features include:
- Edge‑Preserving Dithering: Enhances the distinction between adjacent colors without softening.
- Palette Swapping: At runtime, switch between different color palettes (e.g., day/night or user‑customized palettes) without reloading assets.
- Shader Graph Integration: Create complex visual effects (e.g., shimmering water, flickering torches) while still respecting pixel boundaries.
To use the shader, simply assign it to your SpriteRenderer or UI.Image component, then tweak parameters in the inspector. Because it runs on the GPU, performance remains high even on mobile devices.
Step 6: Animation Workflows – From Frame‑By‑Frame to Unity Animator
Traditional pixel art animation relies on frame‑by‑frame sprite sequences. In 2026, you can streamline this process by:
- Using TexturePacker’s
Sprite Animationexport: It outputs.animfiles that Unity can import directly into the Animator. - Automating frame naming: Follow a naming scheme like
run_001,run_002, etc., so Unity can auto‑detect and order frames. - Applying
Animation Curvesfor timing: In Unity, you can fine‑tune frame durations or add easing for smoother transitions without rewriting frames. - State Machine Setup: Create a clear state machine with transitions for idle, run, jump, attack, etc., keeping the logic organized for future expansions.
This approach reduces the amount of manual keyframe editing and speeds up iteration cycles.
Step 7: Performance Considerations for 2026 Hardware
Even though modern consoles are powerful, pixel art games often target mobile and indie markets where performance budgets are tighter. Here are key optimizations:
- Atlas Size Limits: Keep atlas dimensions at 1024×1024 or 2048×2048; larger atlases can cause texture thrashing on older GPUs.
- Batching and Instancing: Use Unity’s
SpriteRendererbatching features to reduce draw calls. For repeated objects (e.g., coins), enable GPU instancing. - LOD for Pixel Art: Introduce a “low‑resolution” fallback atlas for distant objects, maintaining visual consistency while saving memory.
- CPU‑Side Culling: Implement a simple frustum or tile‑based culling system to avoid rendering unseen sprites.
Profiling with Unity’s Profiler and Frame Debugger will pinpoint bottlenecks early, allowing you to make targeted adjustments.
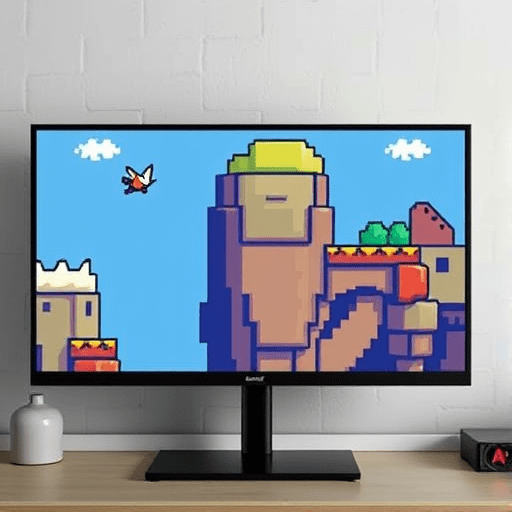
Case Study: Remastering “Retro Quest” for the 2026 Arcade Console
“Retro Quest,” a 16‑bit dungeon crawler released in 2019, saw a surge in popularity when a new arcade console rolled out in 2026. The development team used the workflow outlined above:
- Asset Re‑work: Sprites were re‑painted to a 256‑color palette, and new dithering was applied for smooth shading.
- TexturePacker 2026: All assets were packed into two 2048×2048 atlases with pixel‑perfect packing.
- Unity 2026 Engine: The team used the new
Pixel Art ShaderandPixel Perfect Camerato render on the console’s 4K panel. - Dynamic Scaling: Since the console had a fixed 4K resolution, no scaling was needed, but the team added a “pixel overlay” mode that simulates a 2× resolution for nostalgia.
- Performance: The final build ran at 60 fps on the console, with less than 2 % GPU usage during most scenes.
The result was a visually authentic remaster that resonated with both long‑time fans and new players, demonstrating the effectiveness of the updated remastering pipeline.
Best Practices & Common Pitfalls
- Never use linear filtering on pixel art textures. Point filtering is a must.
- Do not resize sprites in Photoshop after packing. Keep source assets at their native resolution.
- Keep palette consistency. Mixing palettes across a scene can break the visual coherence.
- Test on all target DPI settings early. Late‑stage fixes for scaling artifacts can be costly.
- Leverage community assets wisely. If using third‑party sprite packs, confirm they follow the same pixel‑perfect standards.
Conclusion
Remastering classic pixel art for modern platforms is no longer a simple export‑to‑new‑resolution exercise. It demands meticulous attention to pixel boundaries, texture filtering, and dynamic scaling. By integrating TexturePacker 2026’s pixel‑perfect packing with Unity’s Pixel Perfect Camera, custom shaders, and performance‑aware workflow, developers can bring beloved retro titles to crisp, high‑definition displays while preserving the unmistakable charm that defines pixel art. The result: a bridge between nostalgia and modernity that lets players experience the past with fresh clarity.