When a 3D printer chokes mid‑print, the cost can be more than a few dollars in wasted filament and lost time. For hobbyists and small‑scale makers, an affordable way to catch problems before they cascade into costly failures is to run a lightweight machine‑learning (ML) predictor on the printer’s log data. This guide walks through a practical, budget‑friendly pipeline—starting from raw logs, through feature engineering, to model training, and finally deployment on a Raspberry Pi or similar edge device.
Why Early Failure Detection Matters for 3D Printing
Printing is a long, sequential process where small deviations can snowball. A tiny temperature drift can cause warping, an unclogged nozzle can leave a trail of blobs, and a misaligned bed may result in an entire layer’s failure. Detecting these faults early allows the printer to pause or adjust parameters, saving material and protecting the hardware. Traditional visual monitoring requires a human eye or a camera‑based system, both of which add cost and complexity. By contrast, a software‑centric ML approach leverages data that printers already generate, keeping the solution low‑cost and scalable.
Gathering the Right Data: Logs, Sensors, and G‑Code
Every 3D printer already produces a wealth of data: temperature logs, fan speeds, stepper currents, error messages, and even the G‑code commands sent. The more granular the data, the better the ML model can learn subtle failure patterns.
- Temperature and Fan Logs: Capture ambient, hot‑end, and bed temperatures at high frequency.
- Step‑per‑Second Metrics: Track motor steps and any skipped steps, often indicating mechanical issues.
- Error Flags: Firmware‑generated error codes (e.g., “E-0” for motor overload) provide clear failure signals.
- G‑Code Sequences: The commands themselves can reveal problematic patterns such as abrupt acceleration changes.
Collecting this data is straightforward with OctoPrint plugins or custom scripts that write CSV files or push data to a local database. The key is consistency: ensure that timestamps are synchronized across all data streams.
Building a Lightweight ML Pipeline
Step 1: Data Collection & Cleaning
Start by aggregating logs into a single dataframe. Handle missing values with forward‑fill or simple interpolation, and normalize sensor units (e.g., Celsius to Kelvin if needed). A minimal preprocessing script in Python could look like this:
import pandas as pd

df = pd.read_csv('printer_logs.csv')
df.fillna(method='ffill', inplace=True)
df['timestamp'] = pd.to_datetime(df['timestamp'])
Step 2: Feature Engineering
Raw logs are often noisy. Transform them into meaningful features that ML models can interpret:
- Rolling Averages: 1‑second and 5‑second averages of temperature and current.
- Rate of Change: First derivatives of temperature and speed to detect sudden spikes.
- Step‑Error Ratios: Count of skipped steps per minute.
- Event Flags: Binary indicators for error codes.
These engineered features reduce dimensionality while preserving the predictive signals.
Step 3: Choosing a Model
For a DIY setup, you don’t need deep neural networks. Two solid choices are:
- Random Forest: Handles non‑linear relationships, robust to overfitting, and interpretable through feature importance.
- LightGBM: Faster training, lower memory footprint, and excellent performance on tabular data.
Both libraries can run on a Raspberry Pi 4 with minimal resources if you train offline and export a lightweight model for inference.
Step 4: Training & Validation
Split your dataset into training, validation, and test sets (e.g., 70/15/15). Use k‑fold cross‑validation to guard against overfitting. Aim for a high recall on failure events because missing a fault is costlier than a false alarm.
from sklearn.model_selection import train_test_split, cross_val_score
from lightgbm import LGBMClassifier

X_train, X_test, y_train, y_test = train_test_split(features, labels, test_size=0.15, random_state=42)

model = LGBMClassifier(n_estimators=200, learning_rate=0.1)
model.fit(X_train, y_train)

scores = cross_val_score(model, X_train, y_train, cv=5, scoring='recall')
print(f'Avg Recall: {scores.mean():.3f}')
Deploying on Low‑Cost Edge Devices
Choosing the Right Hardware
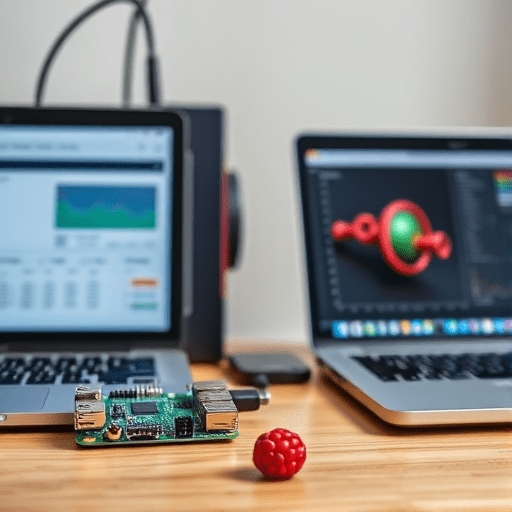
A Raspberry Pi 4 or a Jetson Nano can host the inference model. If you prefer no additional hardware, OctoPrint already runs on a Raspberry Pi, so you can embed the model directly into its plugin architecture.
Integrating with OctoPrint
Write an OctoPrint plugin that reads the live log stream, applies the pre‑trained model, and triggers an action (e.g., pause, send a notification, or adjust the temperature). OctoPrint’s Python API makes it trivial to hook into the printing process.
import octoprint.plugin
from sklearn.externals import joblib

class FailurePredictor(octoprint.plugin.StartupPlugin,
                      octoprint.plugin.EventHandlerPlugin):
    def on_startup(self, host, port):
        self.model = joblib.load('model.pkl')

    def on_event(self, event, payload):
        if event == "PrintProgress":
            features = extract_features(payload['log'])
            prediction = self.model.predict(features)
            if prediction == 1:  # Failure detected
                self.send_notification()
This lightweight plugin keeps your printer running on a single board while gaining real‑time failure awareness.
Evaluating and Iterating
After deployment, log the model’s predictions versus actual outcomes. Use confusion matrices to spot false positives and negatives. A common strategy is to keep a “black‑box” log of predictions so that you can retrain the model periodically with fresh data, ensuring it adapts to firmware updates or new filament types.
Future Improvements and Scaling
Once you’ve proven the concept, consider these extensions:
- Camera‑Based Vision: Combine log‑based predictions with image analysis to detect visual defects.
- Anomaly Detection: Use unsupervised methods like Autoencoders for printers that don’t produce labeled failure data.
- Edge Cloud Sync: Push aggregated metrics to a cloud dashboard for remote monitoring.
- Open‑Source Collaboration: Share your dataset and model in a community repo so others can contribute improvements.
These enhancements maintain the low‑cost ethos while expanding capability.
Conclusion
By harnessing the rich log data already produced by 3D printers and applying simple, interpretable machine‑learning models, makers can detect failures early without expensive hardware. A DIY workflow built around Raspberry Pi, OctoPrint, and lightweight libraries like LightGBM offers an affordable, scalable solution that can be refined over time as more data becomes available. The result is a smarter, more reliable printing experience that protects both the printer and the user’s investment.