Bringing a security-friendly carry-on meal kit on your next flight saves money, improves nutrition, and makes travel more comfortable—this guide shows exactly what to pack, how to stay TSA-compliant, and clever airport resupply hacks so every bite tastes better at 30,000 feet.
Why a Pocket Pantry Beats Airport Food
Airport dining can be expensive, unhealthy, and limited by long lines or late-night closures. A thoughtfully assembled carry-on meal kit gives you control over flavors, dietary needs, and timing. Whether you’re on a red-eye, a family trip, or a work sprint, having reliable food reduces stress and keeps you energized.
Security Rules to Know (Quick and Practical)
- Liquids and gels: The 3-1-1 rule applies in many countries—containers 3.4 oz (100 ml) or less in a single quart-sized bag. Spreadable foods like dips, yogurts, and soups may count as liquids.
- Solids are friendlier: Whole fruits, sandwiches, cured meats, hard cheese, nuts, and baked goods are typically allowed—though some countries restrict fresh produce.
- Sharp tools: Avoid metal knives and certain multi-tools in carry-on luggage; choose plastic or rounded utensils designed for travel.
- Frozen gel packs: Frozen solid ice packs are usually allowed but may be treated as liquids if soft or thawed—keep them rock-solid when screened.
- International travel: Declare fresh produce and check destination rules for meats, dairy, and plants to avoid fines or confiscation.
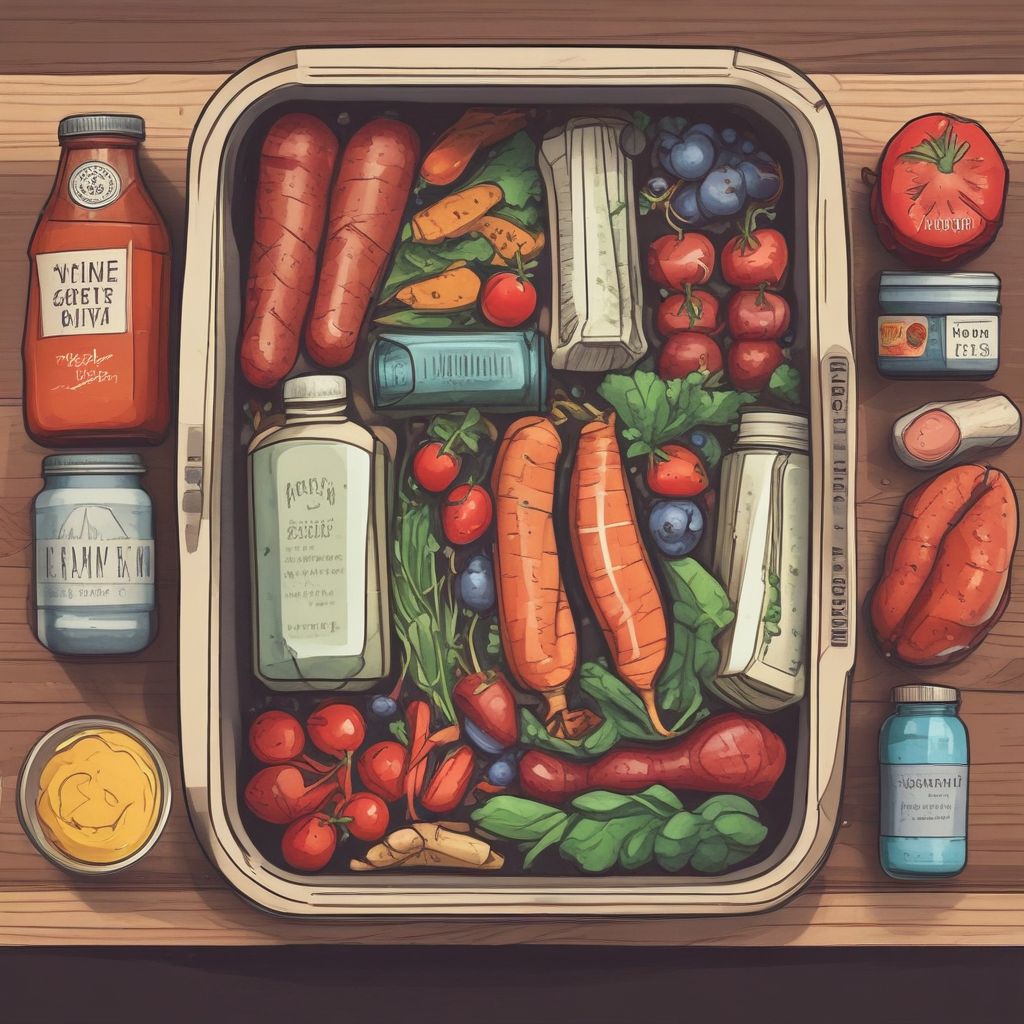
Kit Essentials: Containers, Tools, and Small Gear
Pick compact, leakproof solutions that maximize space and minimize fuss.
- Bento-style boxes: Leakproof compartments make it easy to separate wet and dry items; choose BPA-free plastic or stainless steel (without sharp edges).
- Silicone bags & reusable pouches: Flexible, space-saving, and easy to compress as you eat.
- Insulated pouch or small cooler: Keeps perishables fresh for several hours—combine with a frozen gel pack for longer trips.
- Utensils: Lightweight nylon or bamboo fork/spoon sets and a small pair of scissors (check local rules) for packaging.
- Napkins, wipes, and a small sanitizing spray: Travel hygiene is key on planes.
- Single-serve condiment sachets: Nut butter, olive oil, or hot sauce sachets are TSA-friendly and add flavor without liquid containers.
Long-Life and Travel-Proof Recipe Ideas
These recipes favor ingredients that hold up well without refrigeration for several hours, or cleverly use small insulated packs and post-security resupply.
Grain & Bean Mason Jar Salad
Cooked farro, quinoa, or couscous mixed with chickpeas, roasted bell pepper, chopped herbs, and a spice blend. Pack dressing separately in a single-serve sachet or bring dry seasoning and add oil from a sachet after security.
Curated Charcuterie Bento
- Cured salami or prosciutto (vacuum-sealed), hard cheeses (cheddar, manchego), olives (in solid-packed form), crackers, and dried fruit.
- Hard cheeses and cured meats are flavorful, travel-friendly, and pair with shelf-stable bread or crispbreads bought post-security if needed.
Savory Chickpea “Tuna” Wrap
Mash chickpeas with olive oil, lemon powder, smoked paprika, and chopped celery; wrap in a tortilla or pita. Use mayonnaise alternatives like olive-oil based sachets to stay under liquid limits.
Instant Soup or Noodle Cup (DIY)
Pack freeze-dried vegetables, cooked noodles (kept dry), and a miso or bouillon single-serve cube; add hot water from an airport cafe after security for a comforting, low-effort meal.
Packing Tips for Freshness & Space
- Assemble meals the morning of travel and keep perishable items chilled with a frozen gel pack in an insulated pouch; replace the pack after security if you expect a long wait.
- Layer smartly: heavy items at the bottom, fragile items on top. Use compressible silicone bags to eliminate air and save room.
- Label allergy or dietary notes on a small sticker—useful for connecting flight transfers or when buying resupply items.
- Keep receipts and packaging for specialty foods (vacuum-sealed, commercial dips) to show at security if asked.
Airport Resupply Hacks
Sometimes the best strategy is a hybrid: bring staples and top up after security for fresh components.
- Find a grocery or deli inside the terminal: Many airports have convenience stores with salads, sliced cheese, and fresh fruit—buy perishables after security to avoid screening hassles.
- Use coffee shops: Ask for hot water to rehydrate instant soups or noodles; they’re usually happy to help in exchange for a small purchase.
- Lounges and airline cafés: If you have lounge access, use it to refill water bottles, grab fruit, or take pre-packaged snacks.
- Order ahead: Some airports offer pre-order pickup for sandwiches and bakery items—time it to your connection.
Sample Day-Of Checklist & Meal Plan
- Pre-freeze a gel pack overnight and pack insulated pouch.
- Pack grain salad (mason jar), charcuterie bento, a handful of nuts, and two sachets (olive oil + hot sauce).
- Bring travel utensils, napkin, and a resealable silicone bag for waste.
- Plan to buy a fresh apple or bottled water after security if needed.
Meal plan: breakfast—dry muesli + instant coffee (hot water on site); midflight—mason jar grain salad; snack—nuts and dark chocolate; arrival—fresh baguette or fruit from terminal shop.
Final Safety & Etiquette Notes
Be mindful of strong-smelling foods in tight cabins, dispose of waste responsibly, and avoid noisy or messy preparation during the flight. Respect fellow passengers and the cabin crew—offer to share or repackage if asked.
Traveling with a security-friendly carry-on meal kit turns airline food from an afterthought into an enjoyable, healthful part of the journey. With a little planning, your pocket pantry can make flights more comfortable and flavorful without running afoul of security.
Ready to upgrade your travel meals? Pack one kit this week and taste the difference on your next flight.