When you venture into the backcountry alone, the smallest piece of equipment can become a life‑saving tool. A compact emergency locator beacon—often called a personal locator beacon (PLB) or satellite messenger—offers a reliable way to send your coordinates to rescue services with just a press of a button. In this guide, we walk through the essential factors that solo hikers must consider to select the right beacon for their needs, from weight and battery life to legal compliance and user interface. By the end, you’ll have a clear decision matrix to help you choose a beacon that fits your pack, your budget, and your wilderness confidence.
1. Define Your Primary Use Case
Before opening a product spec sheet, clarify what you expect from the beacon. Solo hikers often face two distinct scenarios:
- Quick Response in Known Areas – If you’re trekking in well‑mapped national parks or backcountry trails where rescue teams routinely monitor radio frequencies, a basic PLB with a 10‑km range may suffice.
- Remote Expeditions with No Network – For high‑altitude, polar, or deep‑forest trips where no rescue crew will be in range, a satellite messenger that can send GPS data via the Iridium or Globalstar networks is essential.
Write down the main environments you’ll encounter and the typical distances you’ll need coverage for. This list will act as a filter when evaluating devices.
2. Compare Network Options and Signal Reliability
Modern beacons fall into three network categories:
- AM/PM Radio (400‑500 MHz) – Cheap, simple, and works in most parks. Coverage is limited by line‑of‑sight and terrain.
- Iridium (Satellite) Network – Global coverage, perfect for remote wilderness, but typically more expensive.
- Hybrid (AM/PM + Iridium) – Dual‑mode devices give you the best of both worlds; they cost more but reduce the risk of network outages.
When reading reviews, pay attention to signal test reports. Look for devices that maintain a 50 % signal probability at 10 km in mountainous terrain and 5 km in dense forest. Some manufacturers publish real‑world range charts that help you assess whether the beacon will actually reach the nearest rescue team from your planned routes.
Signal Interference & Terrain Shielding
Be aware that dense canopy, snow, and high rock faces can attenuate radio waves. For mountain peaks, the higher the beacon’s antenna and the stronger its transmitter, the better the odds of a reliable call. If you’re planning a high‑altitude trek, consider a model that offers a higher‑gain antenna and a “clear‑air” mode that boosts power during clear sky conditions.
3. Evaluate Battery Life and Rechargeability
Battery performance is often a make-or-break factor for solo hikers. A beacon’s advertised battery life can be misleading because it usually assumes continuous use, whereas real usage consists of infrequent button presses.
- CR2032 or Li‑Ion Rechargeable Cells – Many devices use a single 3 V cell that lasts 2‑3 years if left unused. Rechargeable models typically last longer but require a power source during long trips.
- Solar‑Powered Options – Solar panels are a good complement for multi‑week expeditions, but they need regular exposure to sunlight.
- Battery Size & Weight – A lighter beacon (under 50 g) keeps your pack light, but remember that each extra cell adds weight.
Calculate your expected battery usage: if you plan to carry a beacon for 30 days, you need a battery that can sustain at least that period plus a safety margin. Don’t forget to carry a spare battery or a backup charger.
Charging Infrastructure on the Trail
For ultra‑long trips where you’ll be away from power for weeks, consider whether the beacon supports a 12 V or 5 V USB input. Some devices have built‑in USB ports, letting you recharge from a solar panel or a portable power bank. Verify the charging time: a device that takes 12 hours to fully charge may be impractical if you’re in a pinch.
4. Check Legal and Licensing Requirements
In many countries, using satellite beacons for emergency purposes requires a license or registration. For example, in the United States, an Iridium-based beacon must be registered with the FCC and linked to a registered phone number.
- Country‑Specific Restrictions – Always check your national agency’s regulations. Some countries prohibit or limit the use of PLBs.
- Emergency Call Fees – Many satellite networks charge a per‑minute fee for distress calls. Verify whether the device’s manufacturer includes a fee or offers a subscription plan.
- Emergency Contact Management – Some beacons allow you to upload a list of emergency contacts that can be sent automatically. Make sure the contact list can be updated via the accompanying app or web portal.
Ignoring licensing can lead to fines or delayed rescues. Keep documentation of your registration handy, as some rescue teams may ask for proof.
5. Analyze the User Interface & Software Ecosystem
When you’re alone, you need a beacon that is intuitive and reliable. Key interface features include:
- Touchscreen vs. Physical Buttons – Touchscreens can be more sensitive but may fail in cold temperatures; physical buttons are often more robust.
- Low‑Power Mode – Devices that automatically enter standby after inactivity conserve battery and prevent accidental activation.
- Display Quality – A clear, backlit screen helps you confirm that the beacon is on and that your location is being sent.
- Mobile App Integration – Some beacons pair with an app that logs your GPS track and sends alerts to your phone. Verify that the app works offline and that data synchronization occurs once you’re back online.
- Customizable Settings – Ability to set auto‑call intervals, disable certain frequencies, or configure emergency messages can be a lifesaver in unique circumstances.
Test the beacon in a controlled setting: stand in a flat area, press the emergency button, and confirm that the device initiates a call. Feel how many minutes it takes for the app to report your coordinates.
Battery Indicator and Maintenance Alerts
A clear battery level indicator—either on the screen or via LED—helps you avoid sudden power loss. Some devices issue an audible or visual warning when the battery falls below a certain threshold. Additionally, look for firmware that can be updated, ensuring that any bugs or performance improvements are patched.
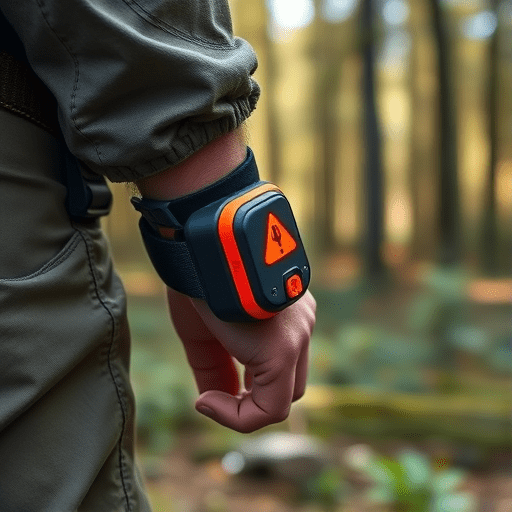
6. Size, Weight, and Mounting Options
Weight is a critical variable for solo hikers. A beacon that weighs 70 g may feel negligible on a 25 kg pack, but if you’re on a 10‑km snow hike, every gram counts.
- Compact Form Factor – Many beacons now come in “clip‑on” designs that attach directly to your pack, eliminating bulk.
- Mounting Accessories – Velcro straps, suction cups, or magnetic holders can help you keep the beacon within reach without adding extra gear.
- Durability vs. Flexibility – Waterproofing (IP68) and shock resistance (IP67) are standard, but a slightly heavier, sturdier casing might offer better protection against falls.
When deciding, weigh the trade‑offs: a slightly heavier beacon might be more robust, but a lighter one could be more convenient for multi‑day treks. Consider your typical route and terrain when making this choice.
7. Cost vs. Feature Set
Beacon prices range from $70 for basic radio devices to $400+ for high‑end hybrid models. Create a budget that balances your financial limits with the essential features you’ve identified:
- Basic PLB – $70‑$120, radio only, simple interface, lower battery life.
- Satellite Messenger – $150‑$300, global coverage, app support, higher cost per call.
- Hybrid Model – $250‑$400, dual network, best for mixed terrain.
Check for bundle deals: some vendors include spare batteries or charging cables in the price. Also, remember that some services offer subscription plans that cover call fees, which can reduce the upfront cost of the device but add a recurring expense.
Warranty and Support
Reliable after‑sales service is crucial if you rely on the beacon during emergencies. Look for a minimum 2‑year warranty, and ensure that the manufacturer offers accessible support—preferably with a 24/7 hotline. Verify whether spare parts (e.g., batteries, antenna cables) are readily available in the regions you plan to visit.
8. Test Your Decision Matrix
Compile the criteria from the previous sections into a spreadsheet. Assign weights based on personal priority—e.g., battery life (30 %), network reliability (25 %), weight (20 %), cost (15 %), and support (10 %). Score each beacon against these categories and calculate a total score. The highest‑scoring device should align best with your solo hiking needs.
Remember that a beacon is not just a piece of technology; it’s a psychological safety net. Choosing the right one reduces stress, allows you to focus on the trail, and increases the likelihood of a swift rescue if something goes wrong.
9. Maintain and Test Regularly
A beacon that was fully functional last season can become unreliable after a year of storage. Schedule quarterly tests: charge the battery, press the emergency button, and verify that your coordinates are transmitted. Store the beacon in a protective case when not in use, and keep spare batteries on hand. If you travel to a different country, re‑register the device if required, and update your emergency contacts.
By keeping your beacon in peak condition, you’ll ensure that when the moment of truth arrives, it will perform flawlessly.
Conclusion
Choosing a compact emergency locator for solo backcountry hiking is a decision that blends technical specs, personal preferences, and legal considerations. By defining your use case, scrutinizing network coverage, evaluating battery life, and factoring in legal requirements, you can narrow down the options to a single beacon that fits your pack, your budget, and your sense of safety. Remember that the best beacon for you is the one you will carry with confidence, knowing that it can deliver help when you need it most. With a well‑chosen device in your pocket, you can explore the wilderness knowing that help is never far away.