Before you hit the open slope, mastering a backcountry ski self‑rescue drill can mean the difference between a safe retreat and a dangerous situation. This guide breaks down the essential steps, incorporates 2026‑era technology, and offers a realistic practice routine that fits even a busy schedule.
Why a Self‑Rescue Drill Matters in 2026
- Higher avalanche risk due to climate change and altered snowpacks.
- New wearable sensors provide real‑time data—use them to refine your rescue technique.
- AI‑driven avalanche alerts can give you seconds to act—your drill should match that speed.
Preparation: Gear, Conditions, and Mindset
Before you even leave the parking lot, double‑check:
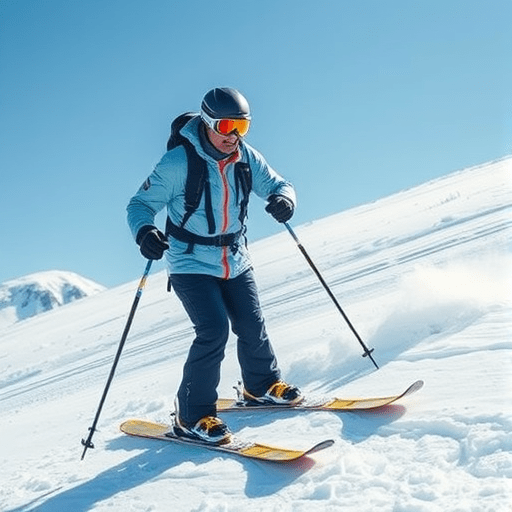
- Backcountry Pack: skis, boots, poles, avalanche beacon, shovel, probe, pack pack.
- Smartphone App: install a dedicated avalanche app that shows real‑time avalanche danger and GPS mapping.
- Wrist‑band Sensor: connect to your phone; it will record acceleration and GPS during the drill.
- Mental Checklist: run through the drill in your head; mental rehearsal speeds up physical execution.
Step‑by‑Step Backcountry Ski Self‑Rescue Drill
Step 1: Set the Scene
Choose a flat or gently sloping area with no obstacles. Mark a 3‑meter circle with a rope or flag; the drill will take place within this zone. If you have a portable snow simulator, use it to create a consistent slope.
Step 2: Simulate the Drop
Stand on the edge of the circle. Pretend you’ve slid off the lift and landed forward. The goal is to get up quickly, not to keep the skis on.
Step 3: Execute the “T‑Position”
1. Plant your pole. Push it forward to create leverage. 2. Flex the knees. Push your heels up to create a stable base. 3. Shift weight. Move your hips forward to bring your body into a “T” shape, which widens your stance.
Step 4: Use the Shovel for Leverage
Insert the shovel blade into the snow, keep the blade flat, and push upward while pulling the handle toward your chest. The shovel acts as a lever—feel the resistance and maintain pressure.
Step 5: Prop Yourself With the Pole
While the shovel pushes upward, use the pole to push against the slope, creating a second point of leverage. Your body should feel like it’s lifting off the snow.
Step 6: Roll to a Prone Position
Once you’ve achieved a slight lift, roll forward into a prone position. This allows you to rest, assess your surroundings, and decide your next move.
Step 7: Transition to an Upright Stance
From prone, shift your weight back onto your shins and push the shovel blade upward again, now while standing on one leg. Keep the pole as a counter‑balance. Finish by standing upright and securing the skis if you plan to keep them.
Step 8: Record & Review
Use your wearable sensor to log the drill. Later, review the acceleration data and GPS path to pinpoint areas where you hesitated or lost balance.
Integrating Tech Into Your Drill (2026 Edition)
Modern tools can give you instant feedback:
- Smartphone Sensors: Use built‑in gyroscope to measure body angle during the lift phase.
- AI Coaching: Some apps offer AI‑based posture analysis, comparing your drill to the ideal motion curve.
- AR Overlay: Wear AR glasses that project a virtual T‑position guide onto the snow.
- Drone Footage: Capture a high‑angle video of your drill to spot timing errors.
Practice Routine: 4‑Week Plan for Beginners
Consistency is key. Here’s a simple schedule you can adapt:
- Week 1: Focus on the T‑position and shovel leverage; practice 3 times.
- Week 2: Add the pole counter‑balance; practice 4 times.
- Week 3: Combine all steps in a single drill; practice 5 times.
- Week 4: Simulate a real‑world scenario (e.g., an actual avalanche alert); practice 6 times.
After each session, log the time to lift and the number of successful repetitions. Aim to reduce lift time by at least 20% over the four weeks.
Common Mistakes & How to Avoid Them
- Not using the shovel blade flat: This reduces leverage. Keep the blade horizontal.
- Relying solely on the pole: The pole can only provide a single point of support.
- Hesitating during the lift: Practice the mental checklist until the motion becomes automatic.
- Ignoring body posture: Keep your back straight and shoulders relaxed.
Internal Link Placeholder
For more advanced techniques, see our guide on Advanced Avalanche Rescue Techniques.
Conclusion
A backcountry ski self‑rescue drill is not just a set of motions—it’s a mindset, a muscle memory, and a safety net. By integrating modern tech, practicing consistently, and focusing on the key leverage points, beginners can build confidence and speed. Remember that the drill is a foundation; always pair it with solid avalanche education and situational awareness.