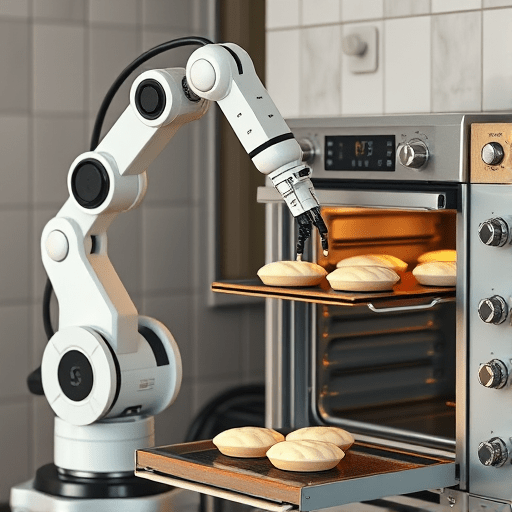
In the bustling world of small‑scale food production, the dream of automating repetitive tasks—like loading dough trays, rotating baking pans, or inspecting finished goods—is no longer reserved for large factories. Affordable 3‑axis robots for small‑scale food production automation can be integrated into existing ovens, turning a conventional kitchen into a mini‑industrial hub. This guide walks hobbyists and tiny food startups through every stage of retrofit, from selecting the right robot to programming and maintenance, ensuring consistent quality and maximum return on investment.
Why 3‑Axis Robots Matter for Tiny Food Startups
Three‑axis robots provide a balance of flexibility, precision, and cost. Unlike their more complex 6‑axis counterparts, 3‑axis systems offer:
- Compact footprint – ideal for kitchen spaces where every square inch counts.
- Lower purchase and maintenance costs – critical for startups operating on tight budgets.
- Reliable point‑to‑point motion – perfect for tasks such as placing trays, turning pans, or opening oven doors.
Moreover, the reduced complexity translates to easier programming and faster deployment, allowing founders to focus on product development rather than long‑term technical support.
Choosing the Right Robot: Key Specs and Cost Breakdown
When evaluating affordable 3‑axis robots, consider the following parameters:
- Reach (max travel distance) – must accommodate oven size and tray dimensions.
- Payload – sufficient to carry dough trays, pans, or small containers.
- Repeatability – ±0.1 mm or better for consistent baking results.
- Controller compatibility – ability to interface with PLCs, Raspberry Pi, or Arduino.
- Warranty and support – especially important for DIY integrations.
Typical price ranges (2026 US$) are as follows:
- Entry‑level models: $1,200–$1,800 – suitable for light‑weight tasks.
- Mid‑tier systems: $2,000–$3,500 – offer higher payload and better precision.
- High‑end options: $4,000+ – reserved for startups scaling beyond a few hundred units per day.
When budgeting, include 10–15% for accessories: mounting brackets, end‑effectors, safety interlocks, and a basic PLC or microcontroller kit.
Planning Your Retrofit: From Legacy Oven to Automated Kitchen
Assessing Oven Compatibility
Begin with a thorough inspection:
- Measure internal dimensions and verify clearances for robot arms and end‑effectors.
- Check door mechanisms – most retrofits use a motorized latch or a simple solenoid to open/close.
- Identify existing safety interlocks – integrate with the robot’s emergency stop for seamless safety compliance.
Designing the Robot Path
Plan a Cartesian coordinate grid that maps key positions:
- Tray loading station – often a prep area outside the oven.
- Oven door – precise opening and closing points.
- Tray placement inside – ensure uniform distribution for even baking.
Using a 3‑axis robot, the path consists of linear X, Y, and Z movements, with optional rotational motion via a servo if the oven’s door requires a swing.
Integrating Sensors and Feedback
For consistent operation, incorporate:
- Force sensors on the end‑effector to detect tray load/unload events.
- Infrared or optical door position sensors to confirm closed status before heating.
- A temperature probe inside the oven to trigger the robot’s “exit” sequence once the desired bake time completes.
These sensors feed into the robot controller, enabling closed‑loop control without manual intervention.
Building the Mechanical Interface: Mounts, End‑Effector, and Safety
Mechanical integration is critical for stability and safety. Follow these steps:
- Mounting – Use a sturdy L‑bracket with vibration‑damping pads to attach the robot base to the oven’s exterior frame. Verify the mount’s load capacity exceeds the robot’s rated weight.
- End‑Effector design – A lightweight, magnetic clamp or vacuum suction pad works well for standard pastry trays. Consider a soft‑gel coating to protect delicate dough surfaces.
- Safety interlocks – Install an emergency stop button near the kitchen counter, wired directly to the robot’s control panel. Add an overspeed sensor to halt motion if the robot exceeds a safe velocity.
During assembly, double‑check all fasteners and ensure no sharp edges could snag the robot’s cables.
Programming the Robot: Simple Scripts for Food Handling
Most affordable 3‑axis robots come with a user‑friendly teach‑stick or a web‑based interface. A typical program looks like:
PROGRAM AutoBake
  SET_SPEED 50
  MOVE_HOME
  // Load tray
  MOVE_TO X=0 Y=0 Z=0
  ACTIVATE_CLAMP
  MOVE_TO X=0 Y=0 Z=100
  // Open door
  ACTIVATE_DOOR
  WAIT 2s
  // Insert tray
  MOVE_TO X=200 Y=0 Z=0
  ACTIVATE_CLAMP
  // Close door
  ACTIVATE_DOOR
  WAIT 2s
  // Bake complete
  MOVE_HOME
END
Use loop constructs to handle multiple batches, and incorporate sensor feedback via if‑then statements to pause until the oven door is fully closed or the internal temperature reaches the target.
Testing and Calibration: Ensuring Consistent Quality
After programming, perform a series of test runs:
- Dry runs – execute the program without trays to verify motion accuracy.
- Calibration checks – adjust the robot’s zero positions so that the clamp aligns perfectly with each tray slot.
- Run a single bake cycle with a test dough batch, inspecting for uniform placement and door integrity.
- Measure temperature profiles to confirm the robot’s timing matches the oven’s heating curve.
Document all settings in a calibration sheet, and keep it near the kitchen for quick reference during maintenance.
Maintenance and Troubleshooting for Longevity
Routine Checks
Schedule weekly inspections focusing on:
- Motor bearings and lead screws – clean and lubricate as per the manufacturer’s guidelines.
- End‑effector clamps – replace wear plates every three months.
- Cable routing – ensure no pinch points or excessive tension.
- Sensor calibration – reset zero points monthly to maintain accuracy.
Common Issues
Even with meticulous setup, some problems arise:
- Missed tray placement – often due to misaligned clamps; recalibrate the end‑effector.
- Door not fully closing – check for mechanical obstruction or sensor misalignment.
- Unexpected stops – verify emergency stop wiring and inspect for loose connections.
Spare Parts
Maintain an inventory of critical components:
- Motor and servo replacement units
- Lead screw bearings and seals
- End‑effector clamps and vacuum seals
- Safety interlock buttons and cables
Having these on hand reduces downtime and keeps the kitchen running smoothly.
By integrating an affordable 3‑axis robot into a legacy oven, small food producers can achieve precise, repeatable production without breaking the bank. The process—from selecting the right hardware to fine‑tuning programming—offers a scalable solution that grows with your business, turning a humble kitchen into a micro‑automated production line.