Venturing into the backcountry can be exhilarating, but it also demands that you protect yourself from the invisible threat of avalanches. For new mountain riders, choosing avalanche-proof gear isn’t just about picking the latest gadgets—it’s about building a reliable safety system that fits your body, riding style, and budget. This step‑by‑step guide walks you through the core components, ergonomic considerations, emerging technologies, and practical testing so you can confidently hit the slopes knowing you’ve made the right choices.
1. Understand the core components of avalanche safety equipment
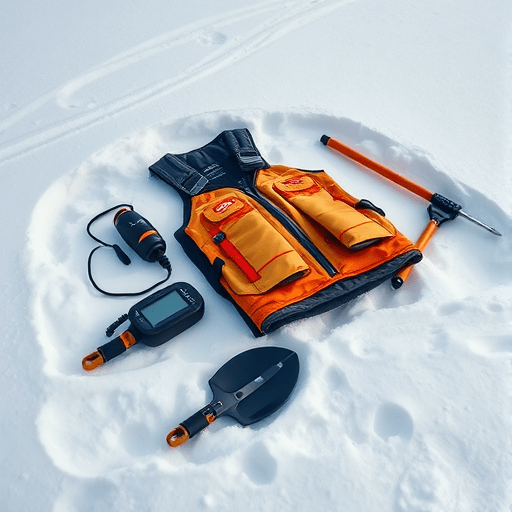
At the heart of every avalanche defense kit are four essential items: a transceiver, probe, shovel, and an avalanche safety vest. While these basics remain unchanged, the quality, ergonomics, and technology embedded in each piece have evolved substantially by 2026.
- Transceiver – Detects other transceivers buried in the snow and serves as the first line of rescue communication.
- Probe – Allows rescuers to pinpoint the exact location of a buried rider.
- Shovel – Enables efficient excavation once a target is located.
- Avalanche safety vest – Helps prevent the rider’s body from sinking and reduces the risk of getting trapped.
1.1 Avalanche Transceiver: The Smart Core
Modern transceivers in 2026 come with features like 5‑tone chirp alerts, integrated GPS coordinates, and compatibility with smartphones for real‑time location sharing. Look for a device that balances sensitivity (the range at which it can pick up signals) with battery life, ideally offering at least 12 hours of operation on a single charge. The ergonomic design matters too—choose a unit with a padded wrist strap and a quick‑release mechanism to prevent accidental detachment during a descent.
1.2 Avalanche Probe: Lightweight Precision
Probes have become ultra‑lightweight, thanks to composite materials like carbon fiber and aluminum alloy. New riders should opt for a probe that is both easy to carry and quick to deploy. A collapsible design that folds into a compact case is ideal, especially if you plan to carry it in a small front pack. Pay attention to the probe’s tip shape; a flexible “V‑shaped” tip can make it easier to navigate through packed snow.
1.3 Shovel: Efficiency Meets Durability
While the shovel’s primary role is to dig, the latest models feature a lightweight steel or titanium blade and a reinforced handle that resists impact. Ergonomic handles, often with a textured grip, reduce hand fatigue during extended rescue operations. For beginners, a shovel that weighs under 2 pounds is advisable, as heavier shovels can become cumbersome on steep terrain.
1.4 Avalanche Safety Vest: The Final Barrier
Safety vests now incorporate inflatable pockets that automatically deploy if the rider begins to sink, a feature that can save precious seconds. The vest should be snug but not restrictive, with adjustable straps to accommodate growth or gear changes. Check that the vest’s weight is less than 1.5 pounds for optimal comfort.
2. Size and ergonomics: how gear fits a beginner rider
Choosing gear that fits well is paramount. A poorly fitted transceiver can become a liability, while a too‑tight vest can impede movement. When sizing, consider the following:
- Body measurements – Measure chest, waist, and arm length to match gear specifications.
- Weight distribution – Gear should sit close to your center of gravity; avoid front packs that shift weight forward during turns.
- Accessory compatibility – Ensure your helmet, goggles, and boots have enough clearance for the vest and probe.
For many new riders, a mid‑size transceiver and a 15‑inch probe are usually sufficient. However, always try the gear on before purchase to confirm comfort.
3. Technology trends in 2026: smart transceivers and GPS integration
2026 marks a significant leap in avalanche safety tech. Smart transceivers now integrate with smartphone apps, providing real‑time triangulation, route mapping, and even predictive avalanche risk based on terrain and weather data. Some devices feature a “self‑check” routine that alerts you if a signal fails to lock within a specific timeframe.
GPS integration is especially useful for beginners who may not be adept at manual triangulation. The data can be shared with a base camp, allowing remote monitoring. Keep in mind that relying solely on technology can be risky; always carry a manual backup and practice traditional rescue techniques.
4. Weight vs. durability: balancing load for new riders
Backcountry gear is a trade‑off between weight and robustness. New riders often prioritize lighter gear to stay agile on steep slopes. However, lighter materials may sacrifice longevity. Evaluate the following factors:
- Material – Aluminum alloy offers a good balance between lightness and strength.
- Construction – Look for reinforced joints and corrosion‑resistant coatings.
- Warranty – A longer warranty often reflects confidence in durability.
Consider a gear package that weighs under 15 pounds total, excluding your standard snowboard or ski equipment. This threshold keeps your load manageable while still providing reliable protection.
5. Certification and compliance: standards you must meet
All avalanche safety gear must meet industry standards set by organizations such as the International Association for Avalanche Research and Management (IAARM) and the International Organization for Standardization (ISO). Key certifications include:
- IAARM/ISO 22670 – For transceivers, ensuring accurate signal detection.
- ISO 17012 – For avalanche probes, guaranteeing depth accuracy.
- ISO 16907 – For avalanche shovels, verifying material strength.
- ISO 16702 – For avalanche safety vests, covering flotation performance.
When shopping, look for a clear certification label on the packaging. This ensures the gear has undergone rigorous testing under realistic conditions.
6. Budgeting for safety: cost‑effective choices without compromising quality
Safety gear can be pricey, but there are smart ways to stay within budget. Prioritize the following:
- Bundle deals – Many retailers offer combo packs that include transceiver, probe, shovel, and vest at a discounted rate.
- Second‑hand quality markets – Used gear from reputable sources can be significantly cheaper while still meeting safety standards.
- Seasonal sales – Watch for end‑of‑season clearances, especially after major events.
Set a realistic budget of $300–$500 for a complete kit. This range typically covers mid‑tier gear that balances performance, durability, and price.
7. Testing your gear before the first descent
Before heading out, run a series of checks:
- Transceiver test – Pair two units and perform a scan to confirm signal detection.
- Probe depth calibration – Drop the probe in a sandbox and verify depth markings.
- Shovel handling – Practice shoveling through a bucket of packed sand to gauge ease of use.
- Vest fit – Wear the vest with all gear to ensure no obstruction of movement.
Document each test with notes; this record helps you identify any issues before a real avalanche scenario.
8. Where to buy and how to read reviews
Purchasing from specialized backcountry gear shops—whether brick‑and‑mortar or online—provides access to knowledgeable staff who can tailor recommendations. When reading reviews, look for:
- User experience in varying snow conditions – Reviews that detail performance in powder, crud, or packed snow.
- Long‑term durability comments – Feedback on how gear holds up over multiple seasons.
- Support and warranty service – Insight into manufacturer responsiveness.
Cross‑check review sites, forums, and YouTube demonstrations to form a comprehensive view.
9. Maintenance and storage: keeping gear ready for next season
Proper maintenance extends gear life and ensures safety during emergencies:
- Transceiver battery care – Store spare batteries in a dry, cool place and replace them every 3–5 years.
- Probe cleaning – Rinse with fresh water after each use and dry completely.
- Shovel inspection – Check for dents or cracks, especially near the handle.
- Vest storage – Keep the vest in a breathable bag; avoid plastic that traps moisture.
Store gear in a temperature‑controlled environment to prevent material degradation. Label each item with your name and contact info for easy identification.
10. Practical drills: how to practice with your new gear
Hands‑on practice is the best way to internalize safety procedures:
- Simulated avalanche drill – Pair with a friend in a controlled environment; bury a dummy and practice detection, probing, and excavation.
- Solo rescue training – Practice wearing the safety vest and handling the shovel while riding a moderate slope.
- Emergency scenario rehearsal – Set up a “situation” where the transceiver fails, forcing you to rely on manual techniques.
Document each drill’s outcome; continuous improvement is key to mastering avalanche safety.
Choosing avalanche-proof backcountry gear as a new mountain rider involves more than picking the most expensive items. By understanding the essential components, ensuring proper fit, staying informed about emerging technology, and committing to regular testing and maintenance, you can build a reliable safety system that enhances both confidence and performance on the backcountry trails.